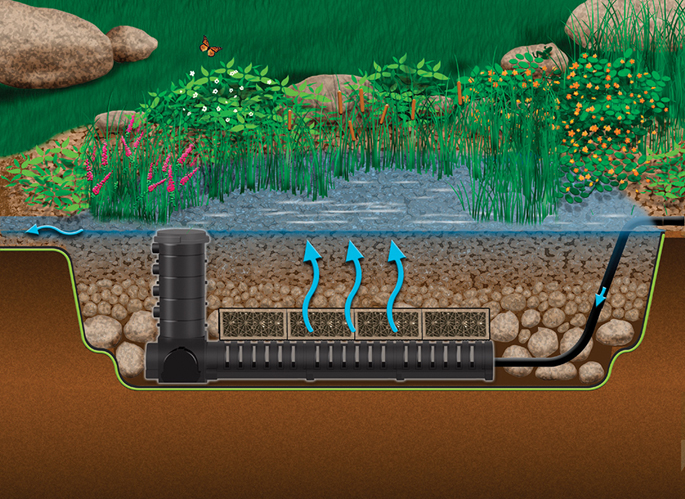
I have been preaching these words for more than 20 years, and it rings true now more than ever. Pond construction as an industry continues to grow and develop, and practices like wetland filtration continue to evolve into more functional, easy-maintenance solutions. These solutions help us maintain the highest level of water quality in our water gardens, yet they become increasingly easier to maintain and service. In this article I will discuss the way we construct our wetland filters and explain how they work. I will also talk about how to plant and clean them — which is rarely necessary!
What Is a Wetland Filter?
A constructed wetland filter in a water feature application is a simple concept. It is an area with very little water flow where plants and beneficial bacteria work in harmony with Mother Nature’s “soup” of microorganisms to remove nutrients and fine sediments from a pond’s water. We like to say that a wetland filter polishes our water, much like reeds and cattails do in naturally occurring marshes and wetlands.
In our experience, there is no biological filter that outperforms a constructed wetland. We have constructed ponds that are 4 feet deep, and the water stays so crystal clear that you can count the individual bits of gravel on the pond’s floor. When torrential rain or our general meddling causes cloudiness in a pond’s water, the wetland filter has it clear again in a few short hours. Here’s how the constructed wetland works for us.
Water is pumped into the wetland from the pond below. At the entry into the filter, we split the water line from the pump. We use most of the flow to create a waterfall that spills onto the surface of the wetland. This does two things. First, it allows the remainder of the water, which will be moving much more slowly, to enter into the bottom of the wetland through the Centipede module, where it disperses and slows down even more. If the design allows the water to move slowly enough at this point, some sediment will fall out of suspension and collect in the bottom of the Centipede module, where it can be removed if the digestion is not as rapid as the accumulation. Second, the upper waterfall stops the siphoning effect of gravity. When the power to the pump is interrupted, the weight of the water in the plumbing naturally creates a siphon flowing back downhill in the plumbing. Without the ability for air to vent through the upper waterfalls to stop this effect, your wetland water, along with all the accumulated debris, will be sucked up by the siphon and spit back into the pond below.
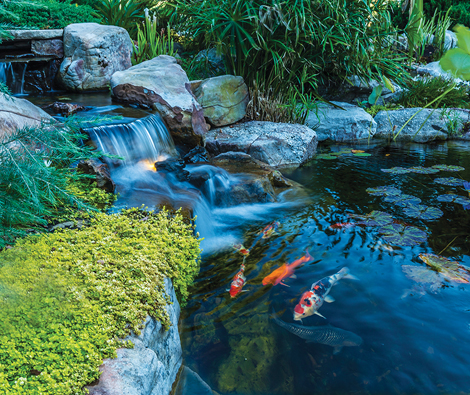
Once the water has dispersed and slowed down within the Centipede module, it flows up into the storage tank, where it spreads out and slows down even more. Here, growing prolifically, your plant roots and nature’s army of microorganisms should be readily waiting to collect and digest the fine particles and nutrients still suspended in the water. This is where the biological filtration happens. The water then flows gently upward through the roots and into the gradients of gravel layered on top of the storage tank. We use a 4- to 6-inch layer of 2- to 5-inch stone, then a 4- to 6-inch layer of ¾- to 1 ½-inch stone, followed by a 4- to 6-inch layer of ¼- to ½-inch stone on top. This formula has allowed us to create enough substrate for proper filtration and desedimentation, while still keeping the filter relatively easy to clean. Extreme situations or specific design requirements may call for a more aggregate depth, but the above formula works well for us in most applications.
When you are finished with the construction of the wetland, there are a few things to remember. First, locate the Snorkel Vault away from the pond edge and higher than water level by 6 inches. Eventually, the sediment loads within the gravel bed can build up and create enough hydraulic pressure that the path of least resistance is up through the Snorkel Vault and out the top. This can cause an edge leak if the Snorkel Vault is right on the edge of the wetland. Often times, the added pressure in the gravel bed will just push more water out of the waterfall on top of the wetland, but this is not always the case — we learned this the hard way. We also like to be sure to keep the liner 12 inches higher than water level all the way around the outside edge of the wetland. Again, the sediment loads within the gravel bed can build up and create enough hydraulic pressure that the path of least resistance is up between the liner and the edge boulders around the outside of the wetland. This happens mostly when we use plants in the wetland that are too large for its size. We have grown plants like banana trees up to 20 feet tall in our wetlands, and I don’t recommend it, because they can cause these types of issues. We also learned this the hard way!
Which Plants Are Best?
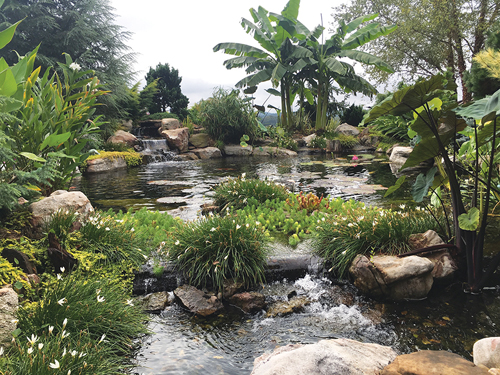
Plant selection varies by region, but our suggestion is to use a variety of plants. We like to use things that are more clump-forming and manageable. Some use of tropical plants can be a good choice in regions where they die off, because the root mass starts new each season. Use plants that are different heights to get roots down at different levels in the gravel mass and within the storage tank. Variety will work for you, and experimentation will show you what’s best in your area.
The cleaning of the constructed wetland is simple. We remove excess foliage, dead plant material and any sludge we can pick up from the surface. The pump feeding the wetland is shut off and the siphon is stopped. We place a clean-out pump down the Snorkel to the bottom and pump out half to two-thirds of the water. This initial flush removes accumulated solids from the Snorkel and Centipede and should have water running clear out of the clean-out discharge hose. We then stop the clean-out pump, attach a high-pressure firehose nozzle and begin cleaning. A simple recirculation of the remaining water does the trick. This is where our constructed wetlands beat the competition’s designs. If you bury pipes or hoses in a huge gravel bed, it is extremely difficult, if not impossible to back-flush or clean the filter in the future. Each time you clean, it becomes more compacted until it finally fails.
With the design we use, blasting water down through the gravel reverse-flushes debris into suspension. We spray until the clear water turns murky, like chocolate milk, and then we pump it out. Then we pump more clear water from the pond into the wetland, filling it about ¼ full. We begin refilling the pond before we do our next flush, and then repeat the process as needed. The pond gets a water change as we clean. Depending on the condition of our filter, we usually do this cycle one to three times. Remember, we are not trying to sanitize it; we just want to remove the solids. The feature is ready to turn back on, and we do this cleaning whenever it is needed — any time of the year — without disturbing the pond, the fish or the functionality of the biological filter.
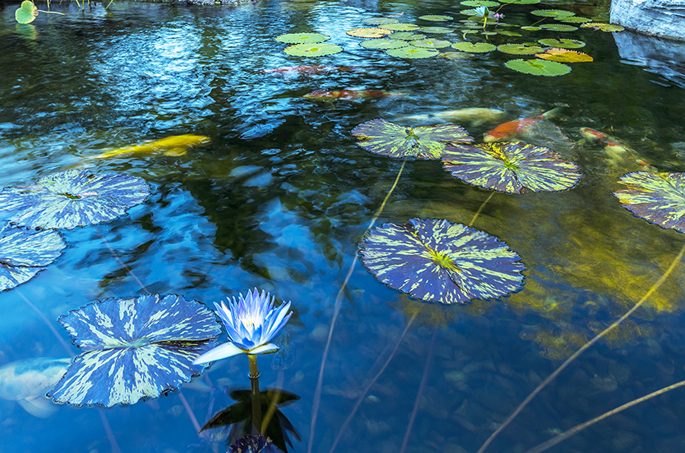
All these reasons are why we think that a constructed wetland is perfect for a biological filter. As for sizing your wetland, just think of any biological filter on the market and how it is rated in gallons. For example, think of the volume of media in a Biofalls filter and how much water it can filter, versus the volume of media in a wetland and how much water it can filter. Every pond is different. Every fish load, plant load, water depth, sun exposure and runoff factor will affect the filter’s effectiveness, but all constructed wetlands seem to be the same — awesome! Undersized pond filters need to be cleaned more often than oversized filters. Experiment; you will not be disappointed in the quality of your results!


Hello ..I am wanting this type of system in my 2000 gallon pond ..I live in Alberta Canada ..Will this work up here
Absolutely, I have several friends in Canada who could help with design and / or installation of your project. If you would like to contact us on facebook at Modern Design Aquascaping or call our office at 865-995-1234 and we can put you in touch with the proper people to meet your needs!
John G Adams
Dear Sir,
I have an area of 4 meter length 2 meter width and 1 meter deep. I want to build it as a waterfall and lily Pond and would appreciate if you could advise me on the filtration system.
Hey there,
Glad you checked in! My typical sizing for wetland filters is 25-30% of the size of the pond surface area. You may want to consider depth, fish load, runoff conditions, etc. and how they affect your numbers /sizing & go from there! There are no exact formulas–bigger is better when it comes to filtration!
https://www.youtube.com/watch?v=VYzqXuTnghI
Follow this link to our YouTube Channel to find out more about contacting us directly!
My great friend Mark Wilson, “The Pond Advisor”, at anypond.com is in the U.K.! He is also amazing at this stuff and could help you out with your needs from over on that side of the pond!
CHEERS 🙂
Hello,
May i also use Pondless waterfall vault + aqua blox´s to create a wetland filter? I feel like the Centipede + Snorkel are too large for my 5m x 4m big pond that i plan to do.
Kind Regards
You can, we have done this in the past. It does not function as well but it works. The centipede module can be purchased as a half as well, and it does a better job of slowing the water down. The biggest thing is to not push too much water through the filter as it will not function properly! Good luck:)
Thanks & Happy Pondering,
John G Adams
Modern Design Aquascaping Inc.
So how much is “too much” here?
Is that determined by the surface area of the filter or the number of centipedes?
I think I left you a long-winded message on youtube? If that wasn’t you let me know!
Hello John,
I have a clay bottom pond. I understand that the wetland filter area requires a liner. Does the pond need to lined?
One other thing, in an earlier comment you mention that your rule of thumb for sizing a filter is 25%-30% of the pond surface. Is that the total area of the filter or is that the surface area of the wetland filter?
Thank you!
There is no exact formula for the wetland. There are so many factors like runoff, soil types, existing organic loads, etc. that it’s just sort of a guideline. I use the 25-30% as a starting point but as features get larger, the % can get smaller. And always, any filter is better than no filter 😉
https://youtu.be/4KPhKpnvuOc check this out, we have intake and wetland videos on our channel, both going into and out of an earthen pond!!
Enjoy,
John G Adams
Can you tell me how to clean Wetland filter?
If properly installed, there will be a snorkel that allows you access to the lowest point in the wetland. You simply open the lid drop a clean out pump down inside and use the wetlands water to flush itself and then pump it out. If additional cleaning is necessary fill the wetland back up 1/4 of the way full recirculate that water through the gravel and pump it out again. Rinse and repeat:)
I think this is great of a wetland water filter if the results are what I am seeing there on the images. This should be adopted and implemented for the betterment of our water environment.
I enjoyed reading this insightful concept on wetland filtration. It is a great idea and I hope this
could be implemented to help the situation.
I have a Shinmaya pump 1.5 HP for my 20x30x 4 pond, wetland is 6×8 x4 with a head pressure of 10 feet. Is this going through the wetland too fast? The water isn’t clear, but no algae problem, it’s 4 weeks new, the pond.
That Shinmawya pump is 4800gph
We designed a wetland 6 feet by 8 by 4 feet deep . Pond is 18 feet by 25 feet with sloped walls. My submersible pump is shinmawya with 4800 gph plus a 10 foot head pressure. Is this too strong, pushing through wetland? Pond is 4 weeks new and water is murky, no real algae, just not clear. Help!!