*To read the feature length article, Landscape Lighting Design and Tips to Illuminate Your Waterscape, click here >>
Below is a visual, step-by-step on how to bury wires for lighting installations.
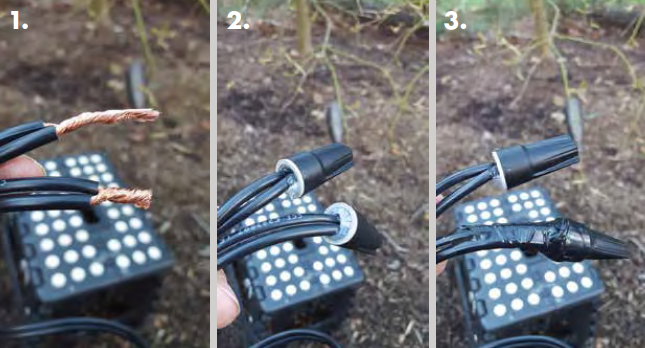
[box style=”rounded” border=”full”](1) After the wire is stripped back, we twist the wires together and give it a clean terminal cut and then (2) use twist-on, silicone-filled connectors and (3) then wrap each connector and wire individually. [/box]
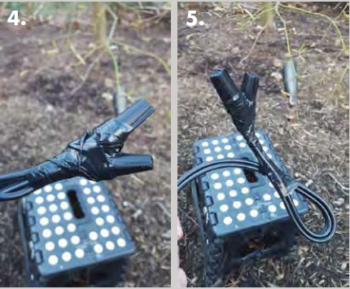
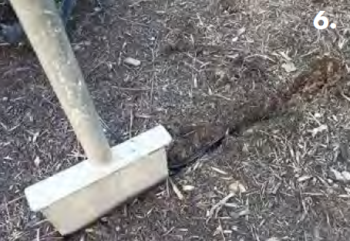
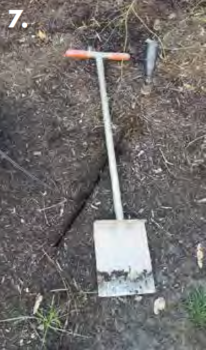
[box style=”rounded” border=”full”](4) Once both connectors are taped up, we wrap each one together to ensure a watertight seal (5) and we go an extra step and double-back the home run wire, taping a loop into the wire. This insures that if the wire were to be pulled, the connectors would not separate.[/box]
[box style=”rounded” border=”full”](6) We bury our lines with this handy line trencher and (7) This line trencher can really speed up installation. When using two, you can work toward each other to reduce installation time even further. This is a tool that my crews wouldn’t leave the shop without. [/box]

[box style=”rounded” border=”full”](8) 8. Having a collapsible seat is a great asset to your installation crew. When installing a large number of fixtures, it can relieve the stress on your knees. Our crews love them! [/box]


Great article, I will use the recommended tips in my masonry business and for the dry stack wall that we are currently building. Thank you from Old Colony Masons, Quincy, Ma.