I’ve been involved in the waterscape and landscape industries since the late-1980s. I was just a young kid back then, going from house to house trying to make a dollar with a skateboard and a mower. Over the adventurous years that have since passed, I have seen the facets of both of these industries grow and evolve with technology. One technology they both utilize — as well as underutilize — is low-voltage lighting.
>> Sidebar | Landscape Lighting Tips and Tricks
Landscape lighting has come a long way, from bulky, energy-hogging fixtures to energy-efficient, LED systems. Even though lighting has evolved, there still seems to be a misconception among clients and contractors alike. Almost 75 percent of my company’s upsell attempts are met with the stigma that outdoor lighting is expensive to install — and even more so to operate. I also hear a significant amount of reluctance from contractors to add lighting installations to their list of services. Contractors seem to have an unfounded belief that lighting is a challenge to design, and that installations can be overly complicated and only marginally profitable. Low-voltage lighting can be a very profitable service to add to your company’s services, and it doesn’t have to be overly expensive for your clients.
Less is More
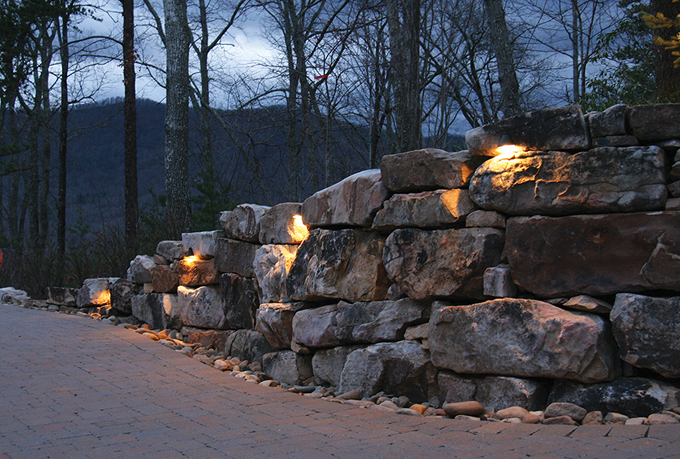
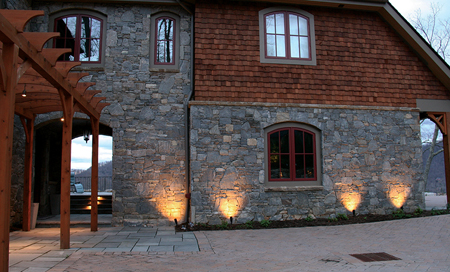
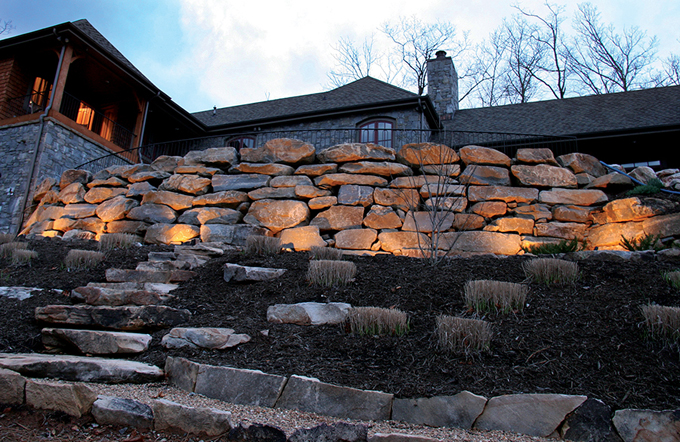
When considering low-voltage lighting installations, there are a few things to think about. The most important thing to remember when designing exterior lighting is that less is more. The eye is always drawn to the greatest concentration of visual contrast, so it really doesn’t take many fixtures to achieve a stunning effect. When designing a layout, it’s important to utilize structure, texture and depth to create an ambiance that helps extend the entertainment value of your landscape into the evening.

Low-voltage lighting in a landscape can be a little more challenging than in a waterscape. It’s important that these focal areas receive the most light, so that all the other areas become secondary. Once you have your focal areas addressed, it’s important to connect them with secondary lighting. Secondary lighting will fill in the gaps to give fluidity and depth to the design. When you have a design that has dark areas between primary focal points, the cohesiveness and the ambiance can be lost. If a primary focal area is a pool bar or cabana, it must be connected to the pond area or back patio with secondary lighting. It may involve some pathway lighting, some small tree up-lighting, or even some down-lighting in order to achieve this. I’ve seen many designs that fall short of being impressive because this simple design technique was not followed.
Fixture, Wattage Selection & Spread
I tend to keep my fixture catalogs out of my clients’ reach. One manufacturer we use has several hundred fixtures with multiple variations to choose from. This can overwhelm a client, which can overwhelm you as they change their selections two or three times, or even more. I tend to ask the client if they would like copper, bronze or black. I usually will only let them make selections of decorative pathway fixtures once the material has been selected.
When selecting wattage, you need to remember the less-is-more rule. I’ve seen many water feature lighting designs in which wattage was an afterthought. I will typically use more fixtures with lower wattage when designing a waterscape. I still have my primaries, which have higher wattage, but my secondary lighting usually consists of more lights and lower wattage. This method gives an even glow to a pond and helps reduce the hot-spot effect that can be created when using fewer lights at a higher wattage.
We like a very clean install when it comes to the transformer. The transformer can be a bit of an eyesore, especially if there are limited options for installation.
Bulb spread is one of the more overlooked aspects of lighting design, even for seasoned installers. Most fixtures come from the manufacturer with a standard beam spread in the 30s. This spread works well for just about all intended applications of the selected fixture. When you need a narrower beam for a spot fixture, you can decrease the spread down to 12 degrees. This can create a hot spot if the distance is not considered, so it’s important to play around with effective placements. When you need to flood an area with light, you can open the spread to 60 degrees with a good, flood-type fixture. It’s more common to use a broader spread bulb than a narrower one. I suggest sticking with the standard bulb that comes with your fixture, and then later experimenting with different spreads and their effects.
Viewing Angles & Perspectives
When placing fixtures in a pond, it’s important to install them at varying depths and angles. This will help create interest and give a true appreciation of the depth of the water column. It’s important to also think about where your viewing areas are when choosing your fixture placements. The last thing that you want to deal with after a project’s completion is having to move a fixture because of direct light shining into viewers’ eyes.
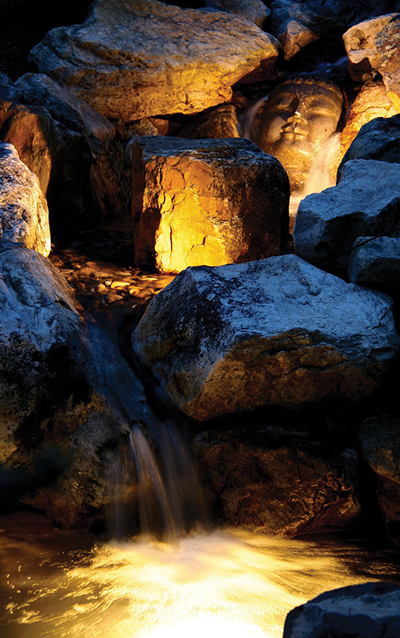
Illuminating existing waterfalls and streams can be a little more challenging. It can be difficult finding places to put fixtures, as large boulders might be in the way, or the design might make it hard to conceal the fixture. When illuminating new construction, you have the ability to install it in the optimal location to achieve your lighting design. Whether it’s an existing system or new construction, you also need to ensure that you do not have dark areas around streams and waterfalls. I always use higher wattage at the base of waterfalls so the light can travel through the descending waterfall, creating a primary focal point. I revert back to using more fixtures with less wattage to fill in the gaps and reduce the dark areas within the watercourse.
There are actually many ways to install these components. Here are some basics techniques and tools used by Liquid Landscapes to install fixtures, wire and transformers. We like a very clean install when it comes to the transformer. The transformer can be a bit of an eyesore, especially if there are limited options for installation. When we mount a transformer, we like to see placement with a 1-foot minimum clearance on all sides.
This helps with moisture control as well as ease of service. All wires entering the transformer should be placed into conduits to protect them from any damage that could occur. The only other place we typically use conduit is if we are going under a walkway or turf area that is subject to yearly aeration. All our home runs usually follow bed lines, staying about 6 inches into the planting beds and away from turf. We like to make the least number of connections possible, so if we have three fixtures in one area, we will piggyback them into one connection point. Just about all manufacturers have a 10-to-15-foot wire lead off their fixtures. When we do make a connection, we use silicone connectors, with each connector wrapped in electrical tape. Then, both connectors are wrapped together. We then take it one more step and fold the home run wire back onto itself, wrapping some tap around all four wires. This is an extra step to ensure that if wires were pulled for any reason, they would not separate.
Landscape lighting is something that just about anyone could get into. After you install one design, it becomes very clear that it’s not as difficult or expensive as one might think. We started having wine-and-cheese lighting demos after our first year of installations. We select a homeowner who might be thinking about doing lighting and install a temporary design, with a 10 percent discount offer on a permanent installation. Then, we send invites for others to join the event.
This year, we are contemplating doing a lighting tour, similar to a pond tour. I personally enjoy lighting designs almost as much as waterscape construction. Lighting is like painting with light — but more like painting by numbers than painting like Picasso. The color and texture are already there. It’s just about learning how to bring the darkness to life.


I like what you said about disguising your transformer when installing landscape lighting. My sister has been telling me about how she wants to make sure that her landscape looks nice in the coming year. I’ll share this information with her so that she can look into her options for professionals who can help her with this lighting.
We hide the Transformers behind the wall when its back filled or in columns if its part of our wall designs.