
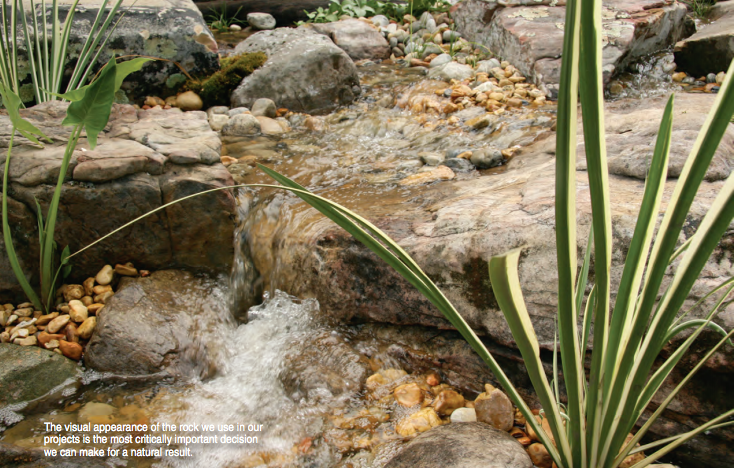
Removing all signs of human influence can be tedious, detail-oriented work. This attention to detail must be maintained at all levels of the project — particularly with the selection and placement of large rock and boulder material — in order to reach full sensory satisfaction in naturalistic results.
How critically important can rock and boulder placement be to the naturalistic look of our water features? Let’s stop and think about that question for a moment.
After a water feature has been completed, there are basically only three kinds of items in view: the water, the terrestrial and aquatic plant material and the rocks and boulders.
The first element, water, only comes two ways: dirty or clean. Most people would obviously want clean water in their water features, so there really is no option here. If you have an adequate filtration system in operation, the water quality should provide for a clean appearance. Thus, we can eliminate water from our equation.
Next is the plant material. Landscaping in and around a water feature can vary tremendously based simply on the selection of plants used or available in your area and the survivability of those plants in the environment in which the project is located (with regards to light, temperature, rainfall amount, et cetera).
The specific type of plant material used can completely change the way a project appears. By doing nothing more than changing the plant material, you can make the landscape look like a tropical rain forest or an arid desert … or change it from an English Garden to a traditional Japanese Garden. Because there is such a wide variety of plant material available today that changes the appearance of your project with drastic fluctuation, we can also eliminate the landscaping from our equation.
Historically, those who have been successful in our industry are the ones who pay close attention to detail. Most important of all is the actual placement of rocks and boulders in final project designs. Knowing when and where to place each rock or boulder can be absolutely critical to the natural appearance of the feature as well as the ability to create adequate hydraulics and movement in the water itself.
Before we discuss proper placement, let’s take a look at attributes your rocks and boulders should possess in order to give the best natural finish. There are six critical areas to consider: Type, Size, Shape, Color, Character and Surface Texture.
Rock Type
The type of rock used in any project should not change throughout the project. If you hike through a canyon, you will see a certain type of rock on your left and the same on your right. You will not see granite on one hillside followed by limestone on the next, so why do some contractors make this unacceptable change in their projects when they are attempting to recreate a naturalistic scene? Choose the type of stone that will best suit your needs and stay with that throughout your project for the best results.
One of the biggest errors committed in our industry is the use of larger river rocks and river boulders in pond projects. River rock is formed in fast, turbulent water and found naturally in stream and river bottoms where it is constantly bombarded by sand and silt, which create its smooth rounded surface. This type of rock will look completely out of place on the shore of a quiet, calm pond, leaving the viewer with the feeling that this pond does not appear natural. So keep river rock where it belongs: in the streambed.
Another incorrect use of rock type in natural-looking water features is the use of flagstone for waterfalls. Flagstone is formed in calm, still waters, created as minerals and other deposits build up over time through the natural forces of heat and pressure. It is a sedimentary rock that will dissolve in water over time. This is why you will never find a natural waterfall made of flagstone.
Rock Size
One of the most common and dreadful errors in today’s water feature projects is the infamous “Pearl Necklace Effect,” in which a contractor lines up a series of same-sized rocks in a monotonous ring of stone surrounding the entire shoreline of the pond! No matter what anyone says about the appearance of this type of water feature, it most certainly doesn’t look natural. You can travel the entire world and never find a natural stream bank, pond edge or lakeshore that is lined with a continuous row of stone bowling balls. Vary the size of your rocks and boulders throughout your designs to create a more naturalistic appearance. You will also find that you will use a smaller amount of rock and stone, saving you additional money without cutting corners in quality.
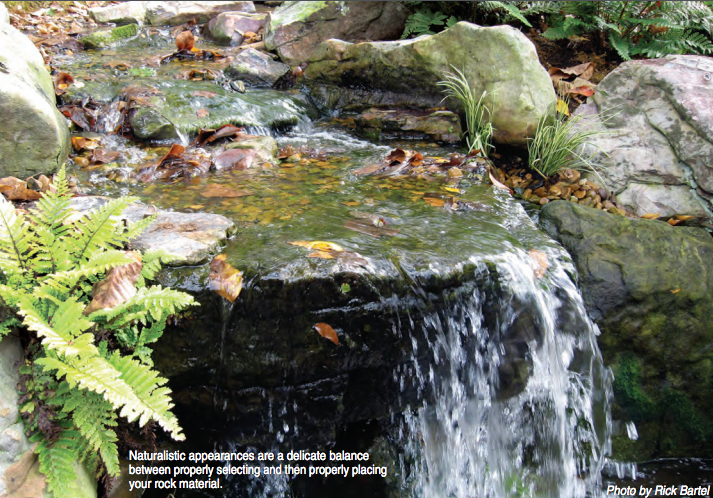
Shape, Color and Character
Always try to use rocks and boulders void of any visual reference to anything man-made. This includes the use of rocks or boulders that have too much of a resemblance to geometric shapes. If a rock is too round, too square or too triangular, it will not only stand out and create an unwanted focal point, but it will lend an air of human origins to your project. Remember, rocks and boulders should typically be structural elements or accents and not the center of attention. You want your visitors and viewers to experience the entire tranquil scene and not be constantly drawn to unwanted focal points.
The colors of your rock materials need to be somewhat consistent with one another. At first glance, a rock may appear as if it is all one color, but upon careful examination you will see there are literally dozens of shades, speckles, blotches and spots that make up the surface of most rocks. For this reason, the rock material you choose can vary to some extent but needs to be within the same range of colors. The quickest way to make an out-of-place rock stick out and be unnecessarily noticed is to change its color. If all of the rocks in your project have a reddish hue, you certainly can’t have a big white rock stuck in the middle and expect it to belong there.
This has always been my favorite attribute and can add tremendous interest and dimension to a natural appearance. Character, or more appropriately, “Character Lines,” are all the little ridges, valleys, crevices, folds and grooves you will find formed on the surface of many varieties of stone. Character lines will enhance the appearance of the rocks in your project by introducing light and shadow to an otherwise smooth surface. When used in conjunction with the movement of water in stream and waterfall applications, these ridges and grooves can provide additional turbulence, enhancing the hydraulics in your design and directly affecting the sights and sounds of the moving water.
Surface Texture
Some contractors like the appearance of freshly broken rock because it unveils the more vividly colored center of the stone, not yet faded by exposure to abrasive weather conditions. However, fresh breaks in rock material give that distinctive man-made quality, since most of these breaks and scars are the result of poor harvesting techniques at the stone quarries. In addition, these freshly broken surfaces usually yield sharp, jagged edges that can be damaging to surfaces such as EPDM pond liners. Naturally appearing, old and worn surfaces can make a huge difference in the overall visual effects desired in a natural setting. A key ingredient to this surface texture is the presence of lichens and mosses, which will grow naturally over time or can be introduced
Always alter or adjust your water’s path. Force it to become narrower and then wider, make the water shallower and then deeper or turn it left and then right. Keep it constantly shifting and changing as it makes its way down the stream or waterfall and across the pond.Now that we have some knowledge regarding the key elements to watch for when selecting rocks and boulders for truly natural-looking water feature projects, let’s take a serious look at how and where these materials should be placed. I like to imagine myself as a drop of water, physically moving down a stretch of stream or over a waterfall and visualizing where I would go or what would happen if there were an object in front of me. This visual process allows me to imagine what would happen to water traveling through my features. I can see what the water is going to do in my mind as I place each rock or boulder. The key aspects of water feature enjoyment are the sights and sounds of moving water. Hydraulic action and turbulence created from water flowing over rock specifically give us this desired result, so follow these tips to ensure that your rock placement and moving water work together for stunning results.
Adjusting a large boulder left, right, forward or backward a few inches— or even turning it slightly one way or the other — can dramatically change the course of your water.
These slight adjustments can create turbulence where there was none before:
■ Be aware of the available output of your pump, as this will ultimately dictate how far apart your rocks and boulders can be placed. Four inches apart might be great for creating hydraulic turbulence with 8,000 gallons of water per hour, but it will make no more than a ripple with 2,000 gallons per hour.
■ If a particular area is too calm, mix it up by adding some resistance to create turbulence. Never allow water to move more than two or three feet without changing direction, even if it is a subtle change.
■ Rocks should make an erratic path along the inside edges of streams and pond shorelines; you also want this same concept of erratic and spontaneous rock placement extending out into the landscape.
■ Use the surface of rock material to your advantage. If a large boulder has a dished-out curve on one of its surfaces, use that to help you move the water in the direction you want it to go …or better yet, use it to force the water in another direction, creating additional hydraulics.
■ Don’t always get caught up making the water do what you want it to do. Allow nature to do what it wants to do naturally. Let the rocks tell you where they need to be placed for the best end results.
■ Always start with the largest rocks first, building the basic foundation of the water course and getting all the main elements in place. Then work down to the smaller material to create interest and turbulence as well as smaller twists and turns within the bigger turns.
■ Never allow your stream banks or pond shorelines to be more than 50 percent large rock material. The worldwide average for natural waterlines is about 40 percent rock.
■ Try adding splits and islands into your streams for added dimension and water movement. The downstream side of an island, protected from the current, is a great place for debris buildup such as a piece of driftwood, a bed of gravel and a few plants.
■ Exaggerate your turns to force water to rebound off of the rocks’ surfaces and not just slide by. Remember that water is like a race car; it will always cut corners, taking the shortest distance between two points and the path of least resistance.
■ Try placing boulders extremely close together to force the water through tight channels and canyons for outstanding effects.
For the best advice on natural rock placement, go take a hike… seriously! Take a nice, leisurely stroll along a stream and study the effects the rocks have on the water’s movement. You will learn more playing in a stream than you will ever learn in a classroom.


Very helpful. Tks
I totally agree. If you’re not careful you could spend days if not weeks playing with the rock and water displacement, which is okay if it’s your own garden.
Don’t forget your light placement. In my opinion it’s another major factor.