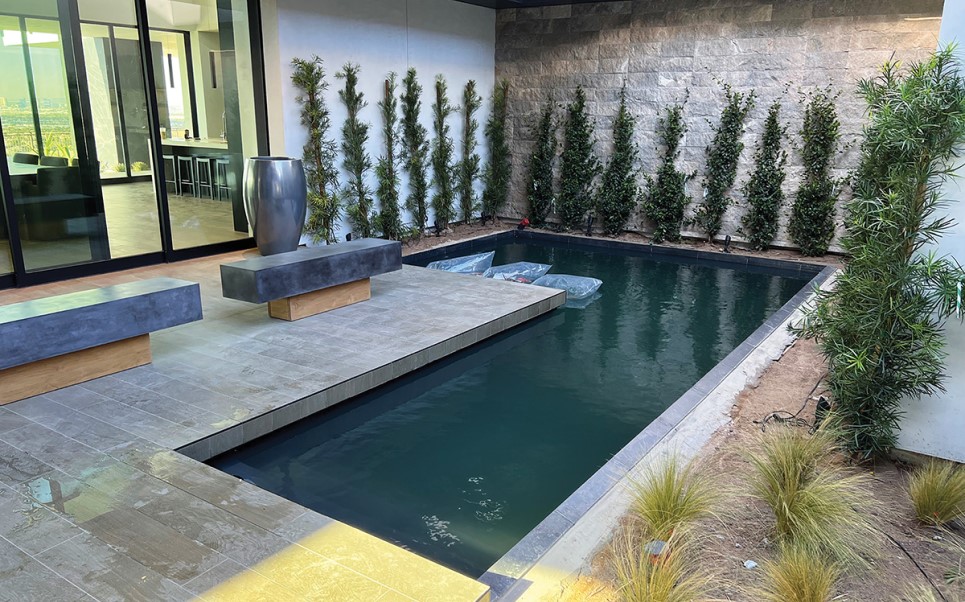
In 2021, I met with architect Michael Gardner, owner of Studio G Architecture, to discuss an upcoming courtyard koi pond build in a development called Ascaya here in Las Vegas. The plans were for a contemporary home with a courtyard pond just inside the front entry gate. The original plans were for a pond of approximately 20,000 gallons, but that would require more space than the clients were willing to give up. The second redesign was 12,000 to 15,000 gallons, with the third and final design at approximately 10,000 gallons. The pond was to share some of the space with a reflecting pond just to the right of the entrance steps leading through the courtyard and into the house. A patio area is between the pond and house with landscape filling the balance of the area surrounding the pond.
Koi Pond Filtration Design
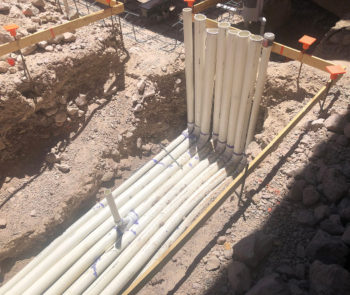
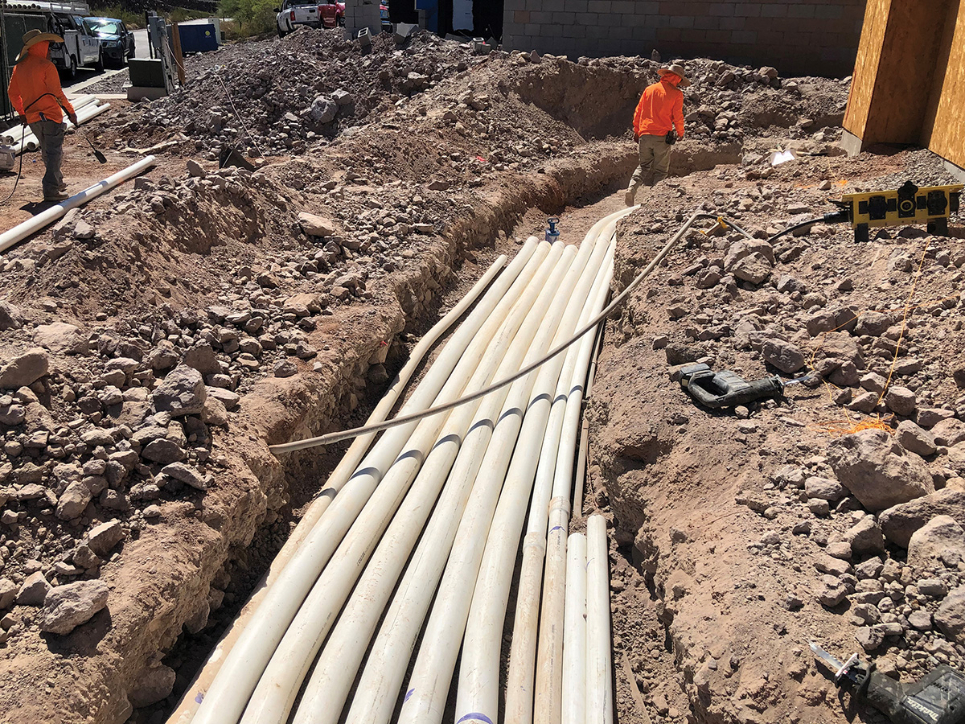
The equipment is located on the south side of the house in an area shared with the pool equipment. Originally the plan was to run all the piping under the house in a direct line to the equipment through a concrete culvert pipe, but the final decision was to run the piping through the entry around the front of the house and up the side to the filtration system. This added about 400 feet to the length of the gravity-flow lines, but it had to be done.

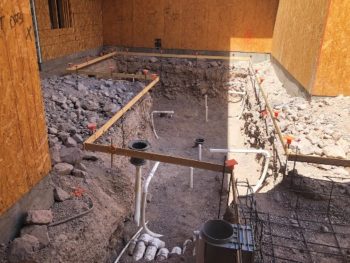
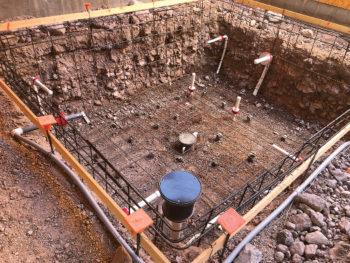
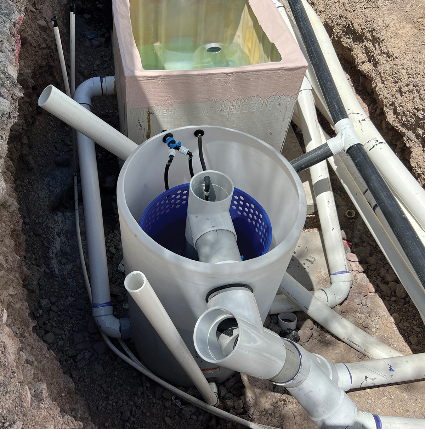
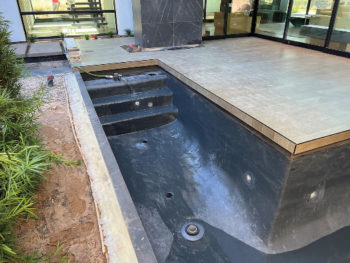
The pond is a slight L-shape consisting of a square area with a 5-foot-wide leg extending toward the entry walkway. The steps for egress are at the end of this leg. Anthony and Sylvan Pools handled the construction, including the plumbing to the filter pit and back. Two of my 4-inch-by-4-inch vertical pond return drains connect to a 275-gallon tote radial separator through two of the six 4-inch lines. This water gravity flows into a vertical air driven dilution reactor (ADDR) with a 6-inch airlift in the center sending the water back to the pond through two more of the 4-inch pipes leading to the centers of the vertical pond return drains.
Two shelf-mounted Aqua-Niche in-pond skimmers and one mid-water drain flow through three 2 ½-inch pipes to the inlet side of a W. Lim Wave 1 ¼ Horsepower pump through three 2-inch ball valves for control and maintenance. The Wave 1 sends water to a W. Lim EZR up-flow sand and gravel filter. The water travels down to the bottom through an 87-watt flow free downflow 6-inch ultraviolet light that is mounted in the center of the filter. The EZR filter is installed with 12 inches of head above the water line of the pond and is gravity flow through the final two of the six 4-inch lines back to the pond. At the pond, these two 4-inch pipes are divided into four 2-inch in-floor returns and seven 1 ½-inch side returns. By dividing the 4-inch pipes into these smaller pipes, I can eliminate valves, as the returns become self-balancing for the most part. Refer to my previous article titled “Fractal Plumbing for Pond Circulation Management” for reference.
In all, six 4-inch pipes, three 2 ½-inch pipes and two 1-inch pipes for the bottom drain aerators were all buried in the trench traveling around the front of the house.
Mind the Gap
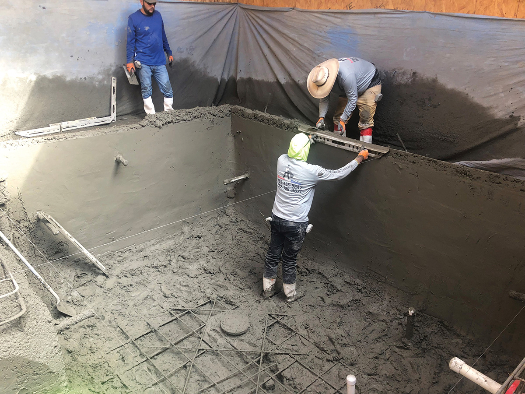
Once the shotcrete shell was parged with Bond Kote for a smoother finish, Paul Parszik of Artizan Aquatics arrived to coat the surface with polyurea.
One issue we had was mechanically clamping the upper edge of the polyurea where the poured patio was to hang over the edge of the pond. This left no easy way to mechanically clamp the top edge of the polyurea. The patio needed to be poured before the polyurea to protect the surface from all the effects of pouring concrete, and the support for the patio edge needed to be secured to the concrete shell —which would be difficult, if not impossible once the polyurea was installed.
The solution was to create a small gap with a removable spacer about 3/8 inches thick and about ½ to ¾ inches deep between the top of the pond shell beam and the underside of the patio that could be removed after the forms came off. Once the Bond Kote was applied, a small grinder was used to clean out the gap for polyurea. This gap allowed Parszik to create a thick upper collar of polyurea that would resist delamination over time.
Immediately after this was complete, the upper 6 inches of the polyurea surrounding the pond edge was coated with Laticrete 9235, acting as a surface to bond to the tile edge. Tile mastic won’t adhere to polyurea, but Laticrete 9235 will. The tile can be attached to this surface because Laticrete is made specifically for a variety of cementatious tile mastic compounds.
Power Play
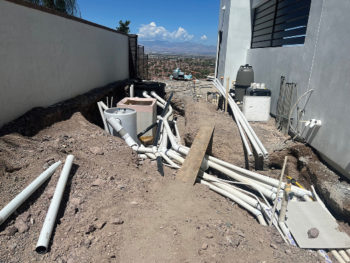
All three of the filters, (prefilter, ADDR, and sand and gravel filter), are installed below ground on a 6-inch-thick slab with rebar reinforcement. This is because, in total, they are approximately 975 gallons and weigh just over 8,000 lbs. That amount of weight must be stabilized on a platform to prevent movement or settling over time. Three Medo 80-lpm air pumps to power the system were installed on a shelf just above the filters. The first air pump powers the water movement in the ADDR biofilter; the second is for the 6-inch airlift; and the third is for the air rings on top of the bottom drain air domes. The bottom drain air pump has a manifold with two small ball valves to balance the flow between the two air rings and is operated by a timer.
Because of the incredible distance of the gravity-flow piping, the inlet manifold on the skimmer-midwater circuit was modified with two more inlets. Each of these were connected to the top cleanout extensions from the 4-inch bottom drainpipes. This proved to be essential in purging those long lines of air so they would flow. Once the skimmer and midwater pipes were purged by the pump and free of air, the valves for the bottom drains could be slowly opened, purging the pipes of air mechanically. The other 4-inch return lines didn’t need this because they each had 1 foot of head to create enough flow to self-purge. The bottom drainpipes to the prefilter had no natural head to purge the air.
Coast-to-Coast Koi
The owner’s koi for this project had been quarantined for approximately a year and a half while the house was under construction. Mat McCann of Beni Hanna Nishikigoi in New Jersey took care of them and shipped those — plus a few new additions — out to Las Vegas after the long wait with no issues in the transport.
This was a long koi pond build with some difficult technical issues along the way. With the fish happily out of quarantine, it makes it all worthwhile in the end.


Hi Kent
My name is Loni Singer and I own a small pond company I have some questions about maintaining a pond I think you designed can you offer some info about the system.