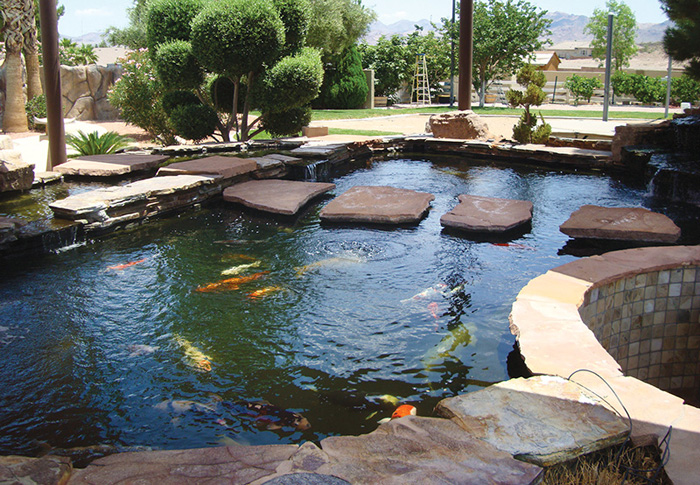
The aesthetic aspect of pond design incorporates many characteristics, such as edge treatment, spill or waterfall type, bridges and, sometimes, islands.
Island construction can come in various forms depending on the technique, but the visual impact and the portion above the water line are usually all the customer is interested in. The designer or contractor must make it buildable and functional. Supporting the visual portion of the island is where the work is.
Pond ‘Keys’
An island can be many things. It can be a simple boulder to give visual depth to the surface or be functional with plants or water flow. Eric Triplett, also known as The Ponddigger, uses the term “specimen,” as in specimen plant or specimen boulder, to signify a particular planting the customer wants or an interesting boulder found at the rock yard that needs to be shown off. Often, an island is the perfect place to showcase these.
Liner Ponds
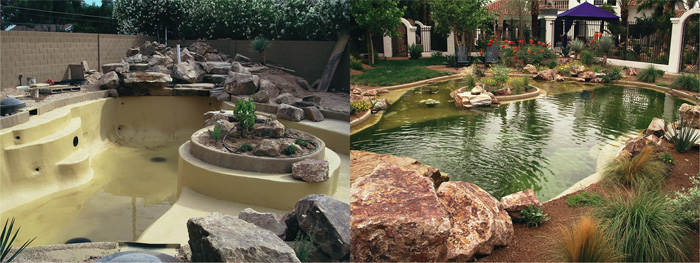
With rubber EPDM liner construction, it is sometimes difficult to bring the liner up and over the water line and capture it without a tremendous number of wrinkles or seamed sections. For these ponds, I like to build supports for stone bridges, as I have mentioned in previous articles.
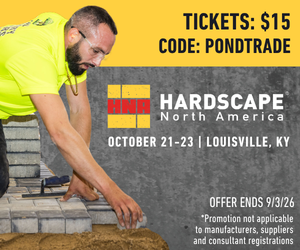
Before the liner is installed, a slab is poured below the liner surface where the island is to be located, providing support for the structure above the liner. Extra padding is placed over the small slab beneath the underlayment, along with an extra piece of liner as protection for the sealing layer. After the main sealing liner is laid down, another piece of scrap liner is laid over it. Then, another slab with rebar is poured over that, sandwiching the sealing liner in between. Monolithic columns can be poured in the slab at the same time using Sonotubes or other forms.
This structure usually comes to just 1 or 2 inches below the water line, creating a support system to build on. The island could be in the form of a concrete or plastic tub, or a cement or flagstone slab. If the island is to be planted and needs drainage, a bulkhead would need to be placed through the liner inside one of the columns, or as a separate tube traveling up into the planter. This sleeve tubing would need to be 1 inch or larger for drainage out, with a dripper line inside traveling from the sprinkler system up into the planter. If the island is large enough to plant a tree or larger bush, it might need to be constructed with block from bottom to top. If this is the case, a strip of liner would need to be wrapped around the vertical walls of the island, seamed together, and then seamed at the bottom.
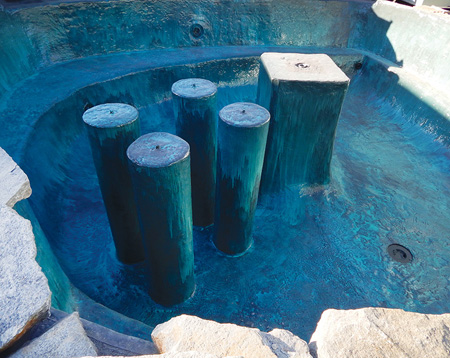
Islands built in a full concrete structure tend to be the easiest. The island is formed as the structure is built, and the entire surface is sealed as a complete unit either with a cementatious coat or a plasticized coating (like polyurea). Planted islands should always be sleeved for water lines, but the drainage is already there in this type of construction. When polyurea is the sealant of choice, the structure can be built with retaining walls, a dirt floor and a built-up island structure consisting of cement block, insulated concrete forms or other material. The floor can be bowled into the island wall structure just as it is along the perimeter, with the polyurea applied over a geotextile cloth to connect all the surfaces together.
Often an island in a small or medium-sized pond just holds a single rock for a turtle island or a small fire feature. These easily can be built with one of the above methods as a single column. Islands can also be installed in the center of a large waterfall, where plants or small trees help to soften the rocks’ hard appearance by allowing the waterfall to flow around it.
Floating Islands
Another choice for island construction is a planted floating island. Floating islands are all about the plants, creating a natural-pond look and as serving as a great source of bioconversion. The material the island is made of will be colonized with beneficial bacteria, with the roots extending down into the water to allow the plants direct access to ammonia and nitrates.
Kelly Billing of Water Becomes a Garden says that floating islands can be a very versatile way to create a planted island. Planted floating islands can do a better job of bioconversion than plants installed along the edges of a pond, because the root structures have greater exposure to water flow. They are easily adaptable to many regional plantings, but care must be taken when choosing the plants and tethering is important.
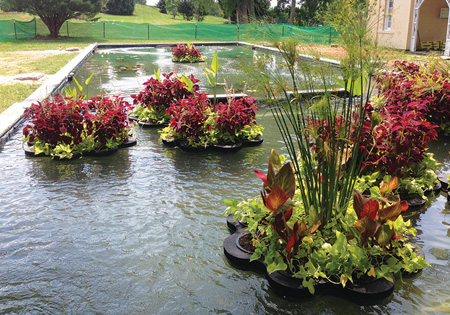
Billing also says that picking quality construction materials takes a little research and should be done diligently. Tethering is usually done with a weight, like a concrete block connected to the bottom of the raft with a poly rope, but this might not be enough if the water flow is strong or if wind is an issue. In these cases, the islands can be tethered to the sides or connected to a permanent anchor designed into the bottom.
Creativity, imagination and, of course, budget are the only things holding back an island project. An island can be anything a customer can imagine — you just have to figure out how to build it!


I’m renovating a large overgrown clay pond and installing a liner this time, but would like to know should I reconstruct the clay island then install the liner up and over the island, or clear the pond fully, install the liner then rebuild the clay island afterwards? Any help is very appreciated. Thanks.