I received a call from a potential new client in late April of 2015. The conversation progressed nicely as I went through the steps of prequalification (being up-front about a consultation fee, giving some basic, ballpark pricing for different sized features, et cetera.) He had a pretty good idea of what he wanted: a pondless waterfall in the backyard. And he was comfortable with the estimates I gave, so we set a time to meet at his home.
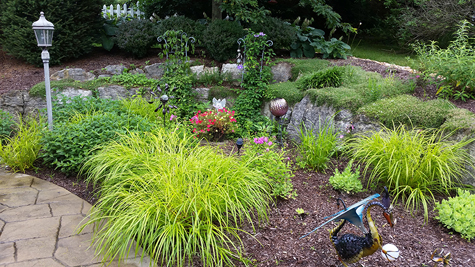
The backyard of the client’s home was very small, yet it had an awesome vibe. A covered patio, shade trees and well-designed landscape beds really made the space feel airy and private at the same time. Upon seeing some obstacles in the backyard — namely the presence of a beautiful, mature boulder retaining wall — I started steering away from the pondless waterfall and into a water feature with a smaller footprint. Not that the boulder wall couldn’t be altered, but the access was too tight for a machine large enough to move the boulders without a complete landscape renovation. That would have been a much larger project than the client wanted to go through, especially considering how “finished” the space already felt.
Making a Plan
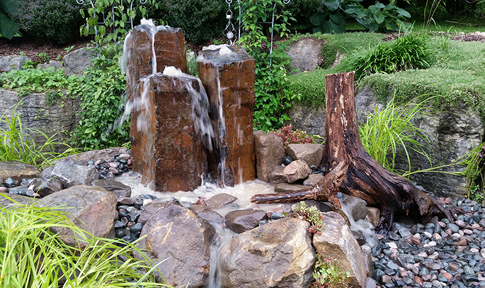
We started talking about smaller water features with a big, yet peaceful, impact. We discussed bubbling boulders and overflowing urns, eventually settling on a set of Mongolian basalt stones with LED lights and a variable-speed pump.
The client selected a corner of the landscape, with the boulder wall as a backdrop, for the placement of the basalt water feature. It promised to be a relatively simple installation, with only two real challenges: first, the client’s desire to have the elevation of the underground reservoir raised to approximately 50 percent above grade for a better view; and second, his desire to see a shallow pool of water at the base of the basalt stones, as opposed to the water going straight through the gravel into the basin below. These requests did not make me uncomfortable, but I did pause for a moment to think about any issues that could arise.
Assessing the Challenges
These are the challenges I knew I would face:
- With the reservoir being 50 percent above ground, there would be more work (and more boulders) needed to hide the liner and exposed matrix boxes.
- A pool of water would require some sort of barrier to impede the water flow into the gravel.
- The pool would need to drain completely into the basin below when the feature was turned off to eliminate the risk of stagnant water.
- Controlling the “splash zone” and elevation of the liner edges would be important so the water had no potential to seep out of the basin on its way down.
With these challenges in mind, I made the necessary adjustments to my price sheet and set the bid at $5,460 for three basalts installed as specified. I use menu-style pricing whenever possible, as this makes the estimates go much quicker on-site.
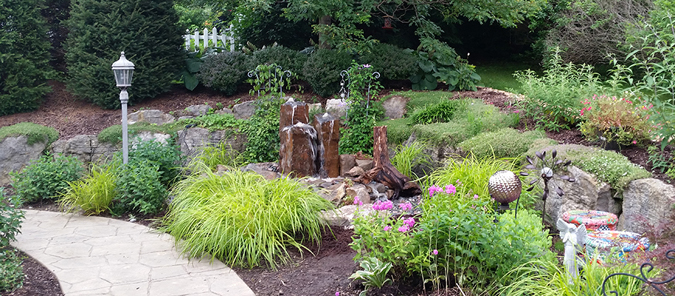
The week before the project was scheduled, I started visualizing the build in my mind. I was particularly starting to wonder how exactly I was going to make the water pool at the bottom of the basalts and yet still drain into the basin below. Then I had an idea: maybe we could make a mini-waterfall for the pooling water to interact with. The more I pictured it, the more it made sense. The water would pool up to a depth of a few inches and then run over a waterfall before entering the underground reservoir. I just wasn’t 100 percent sure of how it would all look, so I kept the idea to myself.
Digging In
Work on this project started the afternoon of Monday, July 6. An inexperienced 16-year-old laborer and I made up the crew. We unloaded materials and completed the excavation. Each wheelbarrow of dirt needed to be wheeled around the side of the house and dumped onto the street. We also had spotty rain all week, which hurt our efficiency.
Tuesday consisted of lining the reservoir, setting the matrix boxes, placing the basalt stones and hooking up the plumbing. I started playing around with my waterfall idea and seeing how the water reacted based on the various adjustments made. If this were a typical installation, we probably would have worked a little longer and been able to complete the project. However, I decided on this day that I was not going to worry much about the time I took to get my ideas to come together. I was challenging myself to try a new way to get added detail into a small water feature. And as water feature artists, we should be taking time to do this once in awhile, right?
On Wednesday I continued tweaking the waterfall and pooling area. As it turns out, it made more sense to have two mini waterfalls as opposed to one, to keep everything in scale. Meanwhile, my laborer shoveled about two tons of wet clay dirt off the road and onto the utility trailer and began cleaning up the site and putting away our tools. I thought we would need a few hours to finish … but alas, I got lost in the moment (OK, many moments) of adjusting water flow and angle of the waterfalls and lights. So after a solid day of tinkering and taking time to teach my helper a few things along the way, the final result was complete. And the client was thrilled with the added touch!
The moral of this story: don’t be afraid to push yourself artistically from time to time, even on a paid installation. If you have the opportunity to try something new, take the extra time to do it. You may lose a little bit in labor profits on the first job, but the feeling of satisfaction will be worth it. Plus, you’ll now have an additional skill that can be upsold on future jobs for a much larger profit.


