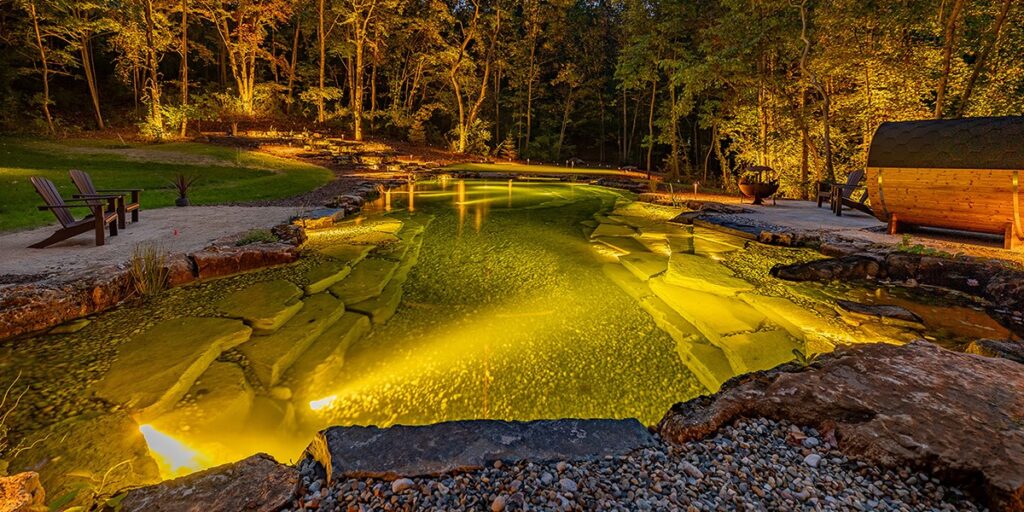
 Professional pond builders prefer low voltage lights for most landscape applications due to ease of installation and cost savings due to lower electric usage.
Low voltage lighting systems contain many elements, which require an installer to master in order to use the right technique in the right application. Such elements include items like local electrical codes, not over loading the transformer (proper electrical load), fixture costs, available outlets and safety issues. You don’t have to be an electrician to install a low voltage lighting system. Just about anybody can install a simple Malibu lighting system. However, the old adage “you get what you pay for” holds true, especially in the low voltage lighting arena. A professional fixture can cost between $50.00-$500.00. Much depends on the materials used to make the light and the craftsmanship built into the light. More expensive lights tend to be made out of copper, brass or composite materials.
When designed and properly installed, a landscape lighting system enables a homeowner to enjoy their landscape way after the sun goes down. Achieving award winning results in landscape lighting requires an understanding of the principles of lighting design and an appreciation of the technology, which lies at the core of the lighting system itself. You can’t practice the ART, until you’ve mastered the SCIENCE of landscape lighting.
A good knowledge of many fields is needed before a great lighting design can be created. For example, one must know how tall a young tree is going to grow, in order to determine which wattage to use as an up light on the tree. If you are up lighting a dwarf palm, which only grows to six´, then a 10-watt bulb will do. If you intend to up light a tree which will reach 50´ or more, then you will want to install at least a 50-watt or bigger bulb.
The ABC’s of lighting are simple. The heart of the landscape lighting system is the transformer. The transformer does just that… it transforms high voltage from the wall socket, into 12-volt low voltage.
Each fixture has two wires, which protrude from the electrical socket of the fixture. These two wires are spliced into wires, which connect into the transformer box. That’s about as simple as it gets. Depending on how many fixtures you tie together to form a “zone,” you connect each fixture, which gets connected, and there you have it…light.
The intention is to make the most of each fixture installed. The next logical step is to hide the fixture in the landscape itself. Fixtures should be hidden, unless the fixture itself is meant to decorate the landscape. Lights should be positioned to avoid creating direct eye contact. Ideally, the garden would include several lights on the pathway and the seating areas. Safety is always the top priority when designing a lighting system. Steps should always be illuminated, as well as pathways. Path lights should be staggered from one side of the path to the other; otherwise, you create what we call “The airline runway effect.”
The following categories represent the 10 most popular techniques used in Garden Lighting.
**1 Up lighting:** This is the most commonly used technique to illuminate trees, walls, and sculptures.
**2 Moonlighting:** This form of down lighting is located overhead and produces a moonlight effect.
**3 Shadowing:** This form of lighting requires a strong plant form, such as yuccas, and a back wall.
**4 Spotlighting:** Used sparingly, this technique picks out larger plants, statues and architectural forms.
**5 Floodlighting:** These are broad light beams, which create dramatic silhouettes.
**6 Accent Lighting:** Small fixtures placed almost anywhere in the garden, to create a calm atmosphere.
**7 Spread Lighting:** Uses wide beam angles to light large areas such as lawns, borders and low shrubs.
**8 Cross Lighting:** This dramatic effect picks out statues, urns, bonsai, and even gnarled tree trunks to highlight.
**9 Silhouetting:** This technique is often used to highlight the outline of trees, palms and archways.
**10 Underwater Lighting:** These submersible aquatic luminaries are used to illuminate the pond and particularly bright colored fish, such as koi.
You may also want to look at fiber optic lighting. This is the neon colored lighting, which changes color.
Although this barely scratches the surface in this new and exciting field, I trust it will start to plant some seeds of good ideas and help you envision how you can use low voltage lighting to create a stunning nighttime atmosphere within your landscape.
*Did You Know–*
Enviroscape won the highest award at last years CLCA landscape lighting competition. This represents years of learning and developing the best of the above techniques and harnessing these into the entire scheme of the landscape plan.

