and the self-tapping screws that were added after
the fact on this skimmer.
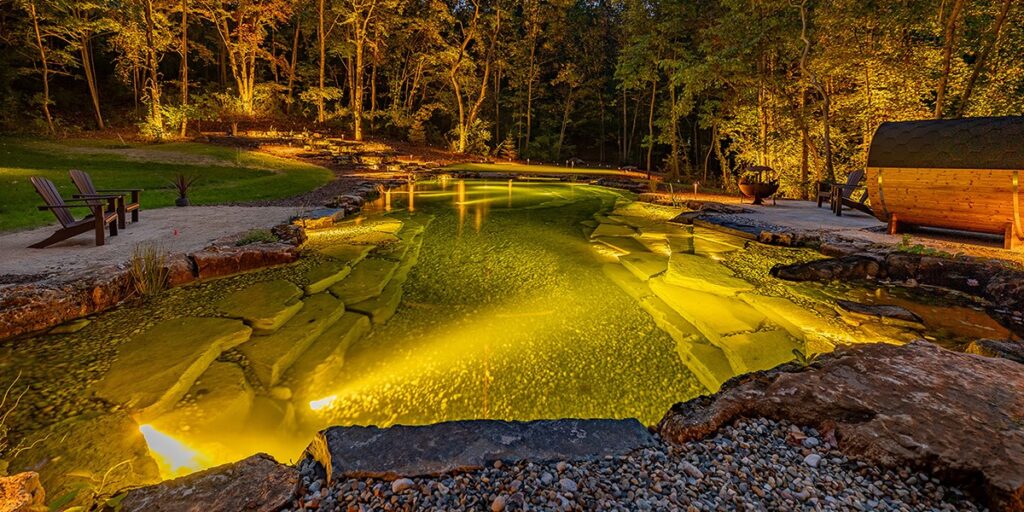
I would like to thank POND Trade magazine for asking me to shed more light on an all-too-common topic — water loss and pond leaks that occur in water features. I will focus on some different issues that cause water loss and discuss how to help recognize them before they escalate. Maybe it will help you prevent them in the first place.
Some of these issues may seem redundant to many of you, but I intend to shed some light on the obvious and the not-so-obvious, along with the common and the not-so-common. As a well-known, respected water feature installer in our beloved industry, I encourage all feedback from all who take the time to read this. This is how we all become stronger as a group — by learning from each other and sharing.
I’m not going to go into the basics, such as shutting off the pond, waiting until it stops dropping, and checking around the perimeter. I’m also not a big advocate of the milk test — when milky liquid makes its way to the area that has been compromised. This has never worked the few times we have tried it.
However, there is a product on the market known as Pond Seal. It is a combination of sodium bentonite clay that is bonded to a limestone aggregate, which creates a small, gravel-like nugget that sinks directly to the bottom of the pond. The clay particles swell when they get wet, creating a seal over the problem area without altering the water chemistry. Some of its claimed successful uses are around drains or intake pipes, along with any cuts or tears in the liner. My company, Liquid Designz, has never tried this product.
Biofalls & Skimmers
Yes, skimmers are becoming less common for the more advanced installer, as we move toward the likes of collection coves and intake bays. But, skimmers are still a staple and will continue to be, in my opinion. Biofalls, of course, are a huge component for many designs.
First, let’s start by eliminating silicone and roofing adhesives and moving to a fish-safe, lap sealant manufactured by the likes of Carlisle or Firestone, among others. These lap sealants become water-ready more quickly and will not break down like silicone. We also use this to outline the perimeter of our seams and patches.

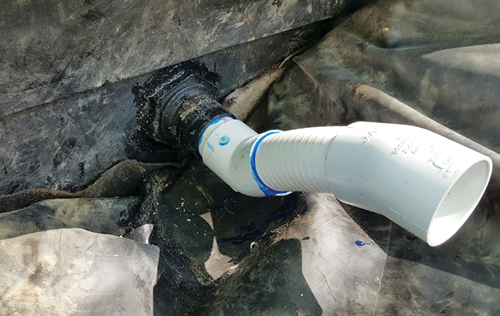
This is not too much of a problem on most skimmers, as the screw holes are much smaller. However, we do use some self-tapping screws to secure a tighter seal. The big issue with skimmers is the cutting of the liner to accommodate most face plates. It’s so important to make smaller cuts, because the liner can stretch.
If you find you have overcut the area and you begin to panic, relax! Pull out the liner, lay it on a flat surface and then pray you have some cover tape and primer in your truck. Prime the outer area about 3 inches around the perimeter and cover the entire area, including the cutout, with high-quality cover tape. Recut your opening — and don’t screw this one up.
Another problem area, as many of you know, occurs at the bottom of both the skimmer and the biofalls. Don’t be stingy; make sure you leave plenty of slack, so that you don’t create a trampoline effect as you start placing rocks so snugly that they literally pull the liner away from the screws and sealant. This creates serious water loss in an area that you might not recognize right away — of course until the dreaded search for the leak begins.
A tip: There have been many occasions when we actually install what we call the “Aqua Cape,” which is a large piece of liner that is already attached to the biofalls. Just be sure to leave plenty of liner on either side of the biofalls based on the size of the framing boulders you will be using. We simply bring the main liner up the front of the biofalls and attach it with seam tape. Then we flash the Aqua Cape over the main liner. This is a great way to train new staff members in a comfortable atmosphere, instead of on a job site where time is always of the essence.
A few warnings: We never cover our bulkheads until the biofalls is tested with the pump running. It’s worth every ounce of inconvenience. We also never dump a heavy load of dirt or rock on top of the bulkhead unless it is supported underneath the pipe. Don’t overtighten!
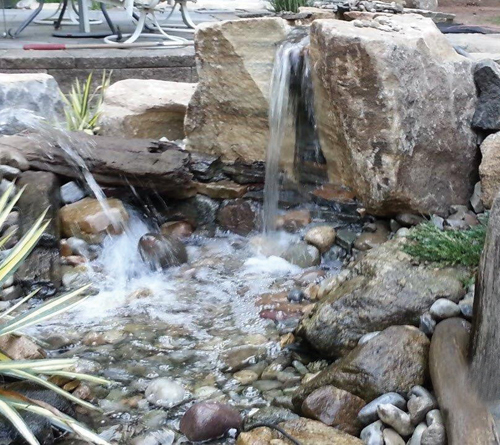
Streams & Waterfalls
When you have determined that there aren’t any open issues in your pond or reservoir, you can start to test for any potential water loss within the stream and waterfall areas. It is a bit of a process to do this correctly, but it will help you pin down the location of a leak more quickly if, in fact, the leak is in the stream or waterfall.
If you cannot use the existing pump, use a separate pump that is close to its pump volume. You can begin moving the pipe or hose in 6-foot sections up the watercourse. This is key, because you want a pump with a similar flow, so that the water within the stream and waterfalls encompasses the width of the watercourse, along with any elevations the water would normally reach. This will help you get a read on a particular area should there be an issue. Make your way throughout the watercourse using the same methods. If your pond or pondless reservoir begins to lose water, you know the culprit is somewhere in that section.
For example, let’s say you have a system with a 6,000-gph pump. If you test it with a different, 3,000-gph pump, the water level will never rise to the height it typically reaches. There could be a hole in your edge work somewhere, but because the water never crests to that level, you’ll never know.
Wetland & Pooling Areas
Wetland areas are becoming more and more common components of our designs. They help create a much more natural-looking start to our water features and provide the installer great flexibility in determining what size filter is needed.
They are also a great home to many species of aquatic plants and a popular hangout for moles, muskrats, chipmunks and other critters that can chew their way through the liner. This obviously causes a water-loss issue that may not be an easy fix.

Depending on your setup, solving this problem can be very similar to finding a leak in a pond; however, it could be much easier, as the size and depth of the wetlands are normally smaller. You need to be sure the water level has stopped dropping — and by this, I’m referring to any areas that were foamed for waterfall spills. Here, the water will dissipate through the foamed area. Usually the water level will drop to where the issue is located, and you can then begin removing rocks to find the problem. We typically patch with a strong cover tape and surround the edges with lap sealant.
As far as deterring the varmints, it’s obvious that geotextile fabric is not so good at this, but there are some good options out there. One is concrete padding, which we have been hearing quite a bit about recently. However, it isn’t cheap. The other option is a staple in Liquid Designz’s installations, both for deterring varmints and protecting liner from large boulder placement. Commercial underlay for carpeting is a must for covering poor excavation conditions, such as rocky slate or shale-like soil. It consists of a very thick, felt material — rubber — that is four times the thickness of standard rock padding. You may have to run your system for a couple of days to pump out the initial water before adding fish, but we use this product in all of our designs to protect the liner under large rocks. We have never had an issue with commercial underlay. If all else fails, the use of underground, electronic mole repellents has worked very well for one of our clients, as it has kept unwanted critters away from the area.
One of the other problem areas that we have encountered is where the pipe actually enters into the wetland itself and attaches to the centipede. If you’re one of those installers who is comfortable with bulk heading through the liner, that is a great way to go. Just be precise with your cuts, and more importantly, be certain regarding the location where you plan to create the bulkhead on the liner. Also be sure to place a piece of cover tape over the liner where you are cutting your hole for the bulk head union, so it is strong enough to avoid tearing or wrinkling the liner as you tighten. Be sure there is plenty of liner pulled up high while you mark your entrance point, or points for multiple bulkheads.
You also can go up and over, as we have done on many occasions in the past. But should we decide not to bulkhead, we would do it a bit differently. We’ve packed mounds of dirt high enough to be sure we were above water level — but trust me, it settles over time due to the downward pressure on the pipe caused by larger rocks, just the standard settling of the soil. In this case, we take the pipe to just below the top of the compacted berm and use multiple 22 or 45-degree fittings, depending on what works best. We then turn the initial fitting on its back so that it’s pointing upward to gradually go up, over and down into the wetland, forming a strong bridge with minimal water restriction. We then put some flat gravel underneath the fittings just for some support. This works extremely well.
Flashing Liners
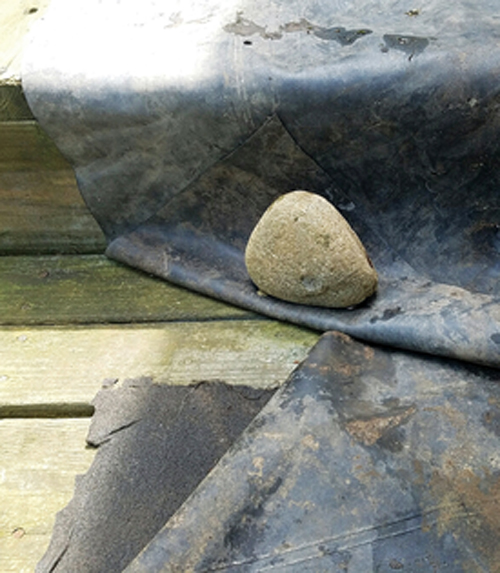
As most of us would probably agree, a good 6 inches of flashing the liner will suffice and avoid any loss related to water coming upward and backward. However, sometimes you get so involved in the design that you decide to get creative and form a 6-inch-deep pool just below the flashing shelf, just for argument’s sake. Now, you have to create some sort of spill to exit that pool, which will now elevate the water to where it can — and will — creep its way back beyond the flash. The worst part is, you might not catch this until after you notice an issue, which could cause you to start ripping things apart while your crew is staring at you like you’ve gone mad. The easiest solution is to remember where you flash, keeping your design moving downward and not pooling unless you’re farther down in the design. And of course — you should just seam everything!
Two years ago, I might’ve played the role of the mad contractor. I did the whole flashing thing and did not seam, but I had almost a foot of liner flash. However, guess what else had more than a foot of flashing. Yes, you guessed it — geotextile, which I use quite a bit, because I like to sleep nights. Well, I might as well have polished off a six-pack of Monster Energy drink, because I wasn’t sleeping for the few days that followed. As you have probably guessed by now, the geotextile wicked the water continuously, and when I finally found the problem, there was a 6-inch pool of mud. Again, just seam everything! Otherwise, be extra careful.
Pond & Stream Edges
Another area notorious for wicking is on a pond or stream edge. My ex-foreman, due to his know-it-all attitude, could never grasp this. He would do an amazing job on edge work, and then I would see our outer layer of protective geotextile going over the liner and, of course, into the water, whether it be a stream or pond. This is why you check everything.
Still going crazy trying to find that leak? Let’s say the pond seems to be holding water, but an unusually slow, steady loss of water is occurring over time. It might be time to check around the perimeter of the pond’s edges and below the edge work and grade, as low as your first shelf. I have found that a soil probe tester works great. As you stick the long probe into the ground around different areas of the pond’s perimeter, the soil gauge will indicate how wet the area is. Make sure to test when area has been dry for a couple of days, without runoff, sprinklers or, obviously, rain.
Stumps, Driftwood & Stones
I have found over the years that authentic, petrified driftwood is truly the only style of wood that you can use within the water itself, whether it just touches the water or is completely submerged. Sure, you can still accent or do some cool edge work with other wood, but it will eventually rot. Yes, bark looks cool, but that will be the first to go. The locust tree is a great source for implementing a timber accent into your designs, but even these will eventually break down.
I once built a pond that led to a negative edge stream constructed entirely over Aqua Blocks. We had used a very cool-looking, thick, dense stump, which also had an arm coming off the side of it. It was obviously used for aesthetics, but it also served as the gateway or transition from the pond to the stream area. I had also seamed a section in the middle of the pond due to a miscalculation of the design and liner size. We filled up the system and turned on the pumps. We left for the day, only to return to a snorkel that was down a good 6 inches. I was livid, because I knew I had seamed it perfectly. So, I checked the seam at both ends under the liner, and it was bone dry. I found myself scratching my head and looking around for the source of the water loss. It was then that I noticed that the water level on the huge stump was not consistent and was very slowly moving up the stump. You guessed it — the problem was the stump. The very next day, the water level was perfect, and there hasn’t been another issue since. The stump had run its course and retained as much water as it was going to. It was quite a relief and a learning moment. By the way, that stump is also rotting.
You might not realize it, but stones can also absorb water. For instance, flagstone is a highly absorbent stone, but it does not absorb deeply because of stone layering. Limestone, on the other hand is deeply absorbent because of its soft texture. It’s is also very soluble, meaning it actually becomes dissolved by the water over time. The longer limestone is exposed to the elements, the more porous it becomes. Sandstone absorbs and retains water significantly, while slate, although not to the same degree as the other three types of stone, is still very absorbent.
Evaporation & Splashing
What has the weather been like? When the humidity levels are low, the dry atmosphere acts like a sponge, absorbing the water from your pond. It can cause your pond to lose up to an inch of water every day. To rule out evaporation as the culprit, fill the pond back up and keep an eye on the water level. Any more than an inch of water loss over a 24-hour period could indicate a leak. Larger waterfalls and quickly running streams, such as rapids, may tend to lose more water. There are many variables that go into determining water loss where evaporation and splashing is a concern. You can run all the formulas you want, but the fact is that evaporation is difficult to pinpoint. Splashing, on the other hand, you can see, alter and somewhat control.
In closing, I certainly hope this information will help you understand what to look for and how to troubleshoot and solve any water-loss issues you may encounter down the road. Regardless of the situation, always remember that occasionally there will always be that one stumper you just can’t figure out.