
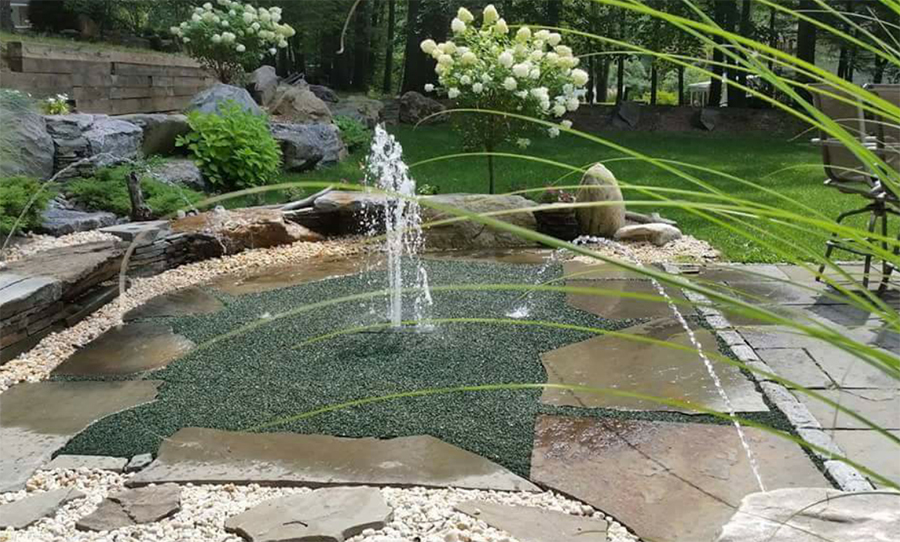
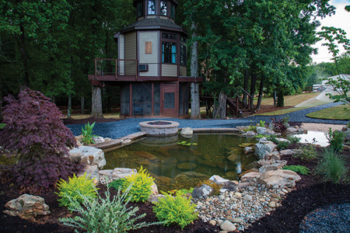
The idea behind this project was to create an aesthetically beautiful but much different addition to an existing patio using the Porous Pave application while creating an assortment of other practical uses. This project was titled our “Hybrid Design” due to the many diverse facets.
The Goals
Our goal on this project was to accomplish the following:
- Construct a 1,200-gallon RWH system to be used to irrigate the backyard along with other daily grey water uses
- Create an extension of the existing bluestone patio
- Dual usage from a patio to a safe, non-slip splash pad for children with multiple water spouts
- The heart of this system would include three main pumps. One pump would run the splash pad spouts and partially the irrigation zones. The other high-efficiency pump would push water 24/7 to the bubbling boulder. We also included an external inline booster pump to aid in achieving the pressure needed for the irrigation zones.
Challenges
As always, the excavation aspect of any design is crucial — in this case, even more so. Unlike most water features, the floor bottom needed to be perfectly level and tightly compacted, as our rain tanks were to have a 2-inch layer of rubberized material known as Porous Pave. The product, which is available in an array of colors, would be spread over the top of them just as you would do with cement. The goal was to create a strong, yet soft, permeable area. It had to be:
- Soft to the touch under bare feet
- Strong enough to hold patio furniture and normal foot traffic
- A permeable surface to capture water that would be stored below
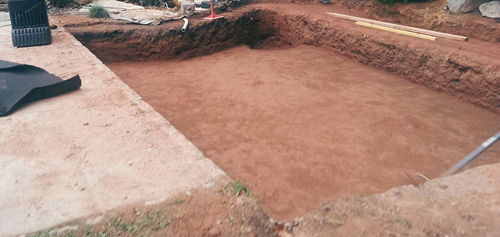
The main challenge with this design was to shoot the levels via transit precisely. The reason for this is that our edges had to butt up to pre-established edged areas, such as an existing Belgium block patio edge on one side and an overflow from a large, recreational pond on a second side, along with accommodating a minimal pitch from the first flush filter. On the other two sides, seating areas were to be created. All this also had to match up with our irregular bluestone border. Sounds like fun, right?
[box]If you are a professional pond installer, submit your latest case study and win the quarterly prize. Click here for more information.[/box]
The other critical issue was creating an overflow that took into account the proximity of the home and existing patio. The unique design element here was that, as I mentioned, pre-determined areas were already established. Our recreational pool/pond would overflow into our 1,200-gallon, newly installed RWH system. Then, as that would overflow, it would take the water around and down to the front of the home, where another 3,000-gallon RWH system was constructed four years ago. The positioning of the overflow bulkhead was a bit tricky, as we had very little pitch to work with from the downspout filter, leaving us with no flexibility. We did not want to be positioning the overflow bulkhead too low, as this would cause us to not utilize the capacity of our reservoir to the fullest.
Another challenge we encountered was working with one of the two components that make up the Porous Pave. There was the actual rubber itself, along with what is known as the “soft binder.” The binder had to be handled with extreme care. It makes waterfall foam look and feel like butter. Anything that the “soft binder” came in contact with —“ including the wheelbarrow, trowels, et cetera —“ had to be coated with vegetable shortening continuously throughout the application. Full arm-length rubber gloves were a necessity, as I found out the hard way. All surrounding areas needed to be covered in advance as the binder could not be removed.
When the excavation was completed and the rubber liner was placed and sandwiched between the layers of geotextile fabric, we were then able to place our rain tanks and snorkel. Once the rain tanks were situated we were able to begin putting the irregular bluestone edging in place. Upon figuring out the placement of the water spouts, we were then able to move forward with the Porous Pave.
Porous Pave
Our first step was to outline all the irregular bluestone edges with painter’s tape, along with covering all existing hardscape and anything else that the bonder could come in contact with. The final challenge was how we would apply the Porous Pave product over the rain tanks without the product falling through. The first thing was to strengthen the rain tanks by zip-tying additional large panels over the top of the constructed rain tanks perpendicularly. It not only increased the strength of the rain tanks by over 50 percent, but it also created smaller holes in the tanks themselves.
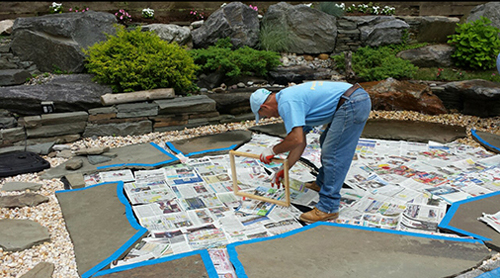
Upon completion of my two Porous Pave certification classes, I decided the best method to use was applying newspaper on top of the rain tanks to create a barrier so the Porous Pave would not penetrate the rain tanks while the product was curing. Once the product cured, the newspaper would disintegrate shortly thereafter.
Another design technique that was necessary to implement in this RWH system was some form of fountainscape that was aesthetically pleasing and mechanically designed to ensure there was no stagnation in the water. With efficiency in mind, we selected a beautiful, one-ton boulder with an up-light situated in the back corner of the patio, designed to run 24/7 on a 2-amp pump. Mission accomplished.


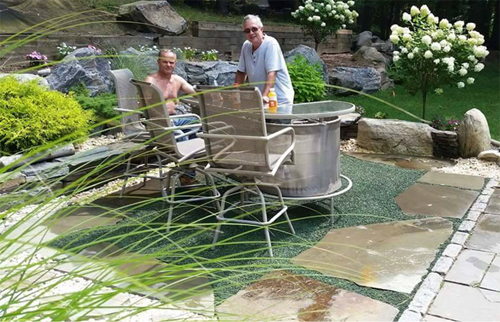
Beautiful! Great idea, two uses for one area, just move the patio furniture and turn on the splash pad when the grand kids come to visit!