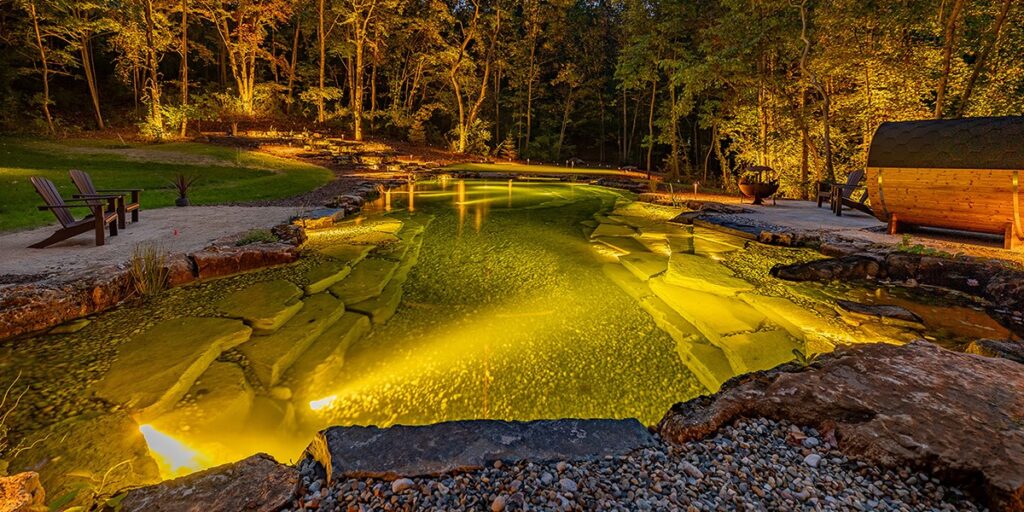
It’s generally known that superior results in naturalistic watershaping require a commitment both to the study of natural geological processes and to figuring out how to mimic those relationships on-site. Just as important is actually getting the opportunity to apply what you’ve learned in the field.

To me, becoming a good or even a great watershaper means you must have the desire to do something special and put forth your very best effort in each and every project. That requires personal discipline…especially in tough times, when finding any opportunities to express yourself creatively at a high level might be few and far between. And it’s particularly true if, like me, you’ve only recently started your professional career.
To a large extent, I think, it’s all about being prepared when the time comes. In my case, I’ve gotten myself ready by intently studying the art of naturalistic watershaping by studying waterfalls and watercourses found in nature. Along with naturally occurring inspiration, I examine the work of the masters (including Anthony Archer-Wills) who have elevated their work to the level of fine art.
This preparation paid off for me when I created the project pictured here. The project was built for a landscape firm’s client, and my crew has maintained it ever since. All of us look back on this project with a significant measure of pride.
Idea Editing
The project came to us in the course of the Chicago Flower & Garden Show, where I designed and built an elaborate garden display. These clients had called, and we’d invited them to come visit us at the show to take a look at our handiwork. They were impressed and let us know they wanted to have something similar on a property where they were building a new home.
After some back and forth, we eventually landed the project. The landscape firm designed the project’s original layout. Subsequently, I was tasked with taking things from outline to fruition—and, as usually happens in such transitions, the initial phase of my work involved editing the design to reflect what could realistically be achieved on-site within the client’s budget.
In my original design, for example, the site was to include a pond large and deep enough for swimming, with a large rock formation and waterfall composition serving as a primary focus. After a few iterations of this basic scheme, we eventually agreed on a simpler program that was scaled back a bit to fit more easily within the setting. Now the pond and waterfall were to occupy an amorphous area of about 50 by 50 feet.
As we moved forward, we found ways to keep the koi on one side of the pond and create a beautiful planting area in the other portion. The original plan’s grotto, however, was set aside as a matter of scale as well as budget and gave way to a beach entry and shallows for the emergent plants that would help blend the pond into its surrounding landscape. Across the water, we placed a waterfall that was to cascade into the pond’s deepest water.
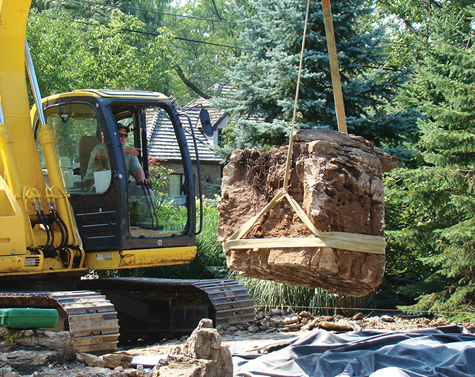
By the time everything was settled and construction was to begin, a fairly complex design had resolved itself down to a reasonably straightforward watershape program—but one that would involve approximately 80 tons of limestone, carefully selected and shipped from Missouri. This stone was to be placed with the utmost care to create a setting that would be perfectly at home on the wooded property while still making a strong visual statement.The property itself is fairly large: a 1.5-acre parcel in an upscale Chicago-area neighborhood. About half the space, however, was taken up by the new house, which is why scale had become such an issue and we had to pare back the original design to make things fit comfortably in the space.
We started our work on-site by contouring the yard and creating a large berm behind the waterfall. Fortunately, this area was situated in such a way that large stands of (mostly) spruce trees on an adjacent property would serve as a visual backdrop.
From Concept to Reality
While in many respects this was quite a simple pond project, one detail of the work was pretty unusual in that we had to work within a grading plan that had previously been established to ensure proper lot drainage.
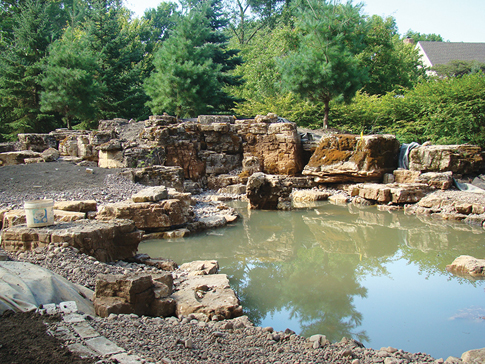
One consequence of this was that we had to raise the water level of the pond about six inches above grade. This meant in turn that we had to build a small retaining wall around a portion of the pond’s downslope edge and then conceal it completely with soil and our edge treatments. This worked out well in practical terms, as we made this assembly part of the beach entrance/shallow area and used it for placement of emergent plants and creation of a small wetland space.
It also worked with my usual desire to bring variety to my pond-edge treatments and lend the setting a more natural appearance. I’ve found that even if you do the rockwork well and manage to avoid the dreaded “string of pearls” look, things can still look artificial if a pond is completely surrounded by hard edges. So in this project, the shallow area serves the dual purpose of creating a convenient place to enter and leave the water, while at the same time helping to conjure a more natural appearance.
As I moved along, I applied not only the aesthetic lessons I learned from studying nature and master water gardeners, but also the practical ones I picked up through the years. The pond itself, for example, is configured using the “shelf design” method commonly used on many projects. As we gradually removed the top few inches of soil to establish the level of the primary shelves, we used the spoils here and from the pond’s inner contours to build a four-foot-tall berm on the side opposite the beach entry.
The soil was mostly clay, with not a lot of rock material and a smattering of old construction debris. Not taking any chances, we laid down an 8-ounce underlayment fabric to protect the 45-mil rubber liner—and in this case were able to cover the pond with a single, seamless piece.
Next, we strategically placed (and concealed) skimmer boxes around the pond’s perimeter. One of them works only to circulate water and is plumbed to a return outlet hidden on the bottom of the pond. The other two filter water through biofall units we placed behind the waterfall structure. (We opted for this circulation approach primarily because we didn’t have enough room to install the constructed wetlands needed for a large biofiltration area.)
In all, the system carries about 12,000 gallons of water. There’s ample freeboard in the pond to contain the water when the circulation system is off, but if there’s a heavy storm that causes the system to overflow, water flows to a natural-looking feature that will serve as a temporary waterfall and direct the water to an engineered swale that runs through the property. Basically, this functional overflow area looks like a dry creek bed.
Stacking Stone
As was suggested above, the core of the project had to do with stone selection and placement. Some might question going all the way to Missouri to get it, as we have good supplies of limestone both in Illinois and in nearby Wisconsin. But in neither case do the nearby sources have stone with the physical features or the visual character we wanted.
First, the Missouri stone has wonderfully complex surface gradations, including patches of lichen, obvious wind-and-water erosion and richly colored veins. Also, unlike local material that comes out of the ground as sheets, the Missouri limestone comes out in bold, block-like chunks that have almost sculptural shapes. This characteristic alone would save us the need to stack up layer upon layer of local stone to achieve the required elevations.
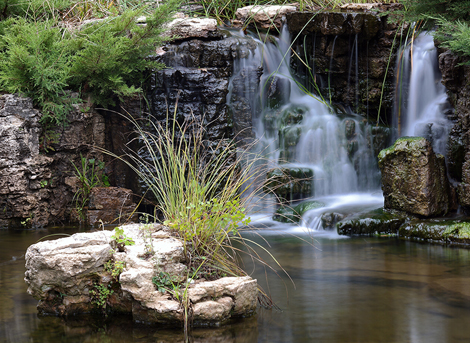
As a bonus, the natural shapes of the stones we acquired made it relatively easy to assemble the rocks in such a way that they seemed to be single formations—as though they’d been there forever and had only been exposed by wind and rain.
While at the quarry, I began the process of visualizing how everything would come together on-site. In fact, I numbered key pieces as a guide, thinking about how striations and color patterns would align and ways in which I could achieve a convincingly “monolithic” appearance.
Certainly, there was some adjusting and improvising on-site, but my process of visualization paid off in a big way once we started placing the stone. With very few exceptions, the pieces of the puzzle came together in accordance with what I’d imagined—and I’m truly convinced that I set the table for an installation process that went smoothly and didn’t require much tinkering along the way.
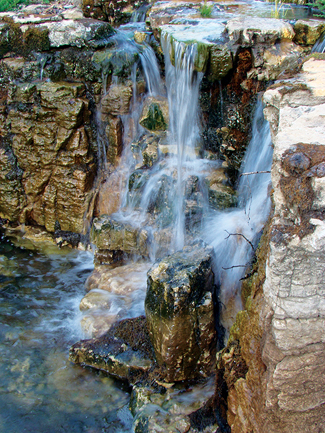
As it turns out, the seams between stones are distinctly difficult to read. As I had hoped, it looks like a single, large formation fractured through the centuries by freeze/thaw cycles and softened by the elements for generations untold. The pieces fit together so well, in fact, that it’s all dry stacked; no concrete is used anywhere in the pond. We then pulled the liner up behind the stones and locked the stones in place with careful backfilling.
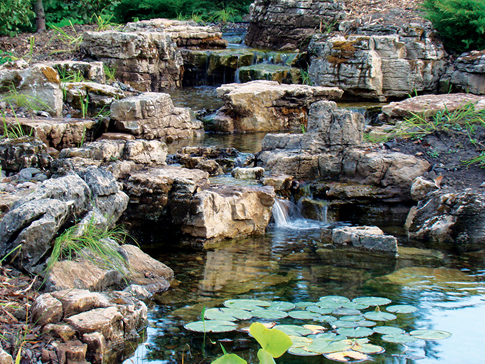
We went to great pains to conceal the water’s source—in this case, two units hidden at the top of the waterfall. In one case, the flow revealed a fissure in one of the main stone pieces that had become filled with soil. The water flushed the fissure and created an unexpected rivulet of water that looks absolutely and naturally perfect.
We exploited other fissures in the stone to guide flows and break up any monotonous sort of sheeting effects. As we moved along, we also extended the look of the falls down into the pond itself, placing smaller pieces of stone in the water, and then around the sides and trailing off into the landscape.
Blending In
All was going nicely at this point. The waterfall, made using a single run of taller pieces we’d selected for the purpose at the quarry, now rose up about three feet above the pond’s level.
It was at this point that we ran into the need to make a major adjustment. As things developed and the homeowners could actually see what they were getting, they decided that they wanted the waterfall to make a more dramatic statement and asked us to add a couple feet to its elevation.
Far from being a problem, this actually made me happy because, thanks to the way the stone was fitting into the scene, we could easily make the structure taller without compromising its natural look. In fact, I saw right away that pushing the falls up to five feet would create a substantially more dramatic look.
So, I ordered an extra truckload of flatter pieces (from 1.5 to two feet thick) and carefully removed the waterfall stones and worked them under the structure and rebuilt the waterfall and surrounding formation. Again, given the naturally flat profiles of the stone pieces, it’s nearly impossible to tell that we added even an inch to the height of the formation.
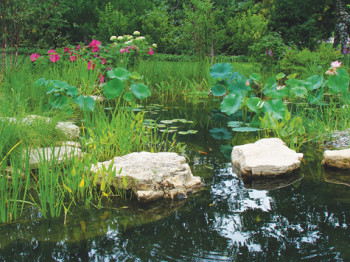
This and most everything else we did on-site revolved around a single touchstone: it was our desire in everything we did to make our work appear as though the pond and its surroundings had been there long before people came along and encroached upon the space.
To manage such an effect, I applied a variety of lessons I’ve learned through the years: steps such as backfilling the soil behind the rocks along or near the edges to complete the impression that the stones are part of a natural outcropping, for example. This simple detail enabled us to use terrestrial plantings in such a way that they appear to be climbing over the stone to reach into the water; on the flip side, it makes it appear as though the aquatic plantings are pushing to reach beyond the water and fuse themselves with the rockwork and soil.
Ultimately, it’s all about obscuring boundaries and leaving the observer guessing about where the body of water stops and the landscape begins. As I see it, this is where good planning and visualizing meet improvisation. You have to look at nature enough to develop an intuitive feel, but at the same time, you need to implement deliberate strategies to piece everything together and make small adjustments as you go.
In addition, I see client education as a key factor, both in managing expectations and in encouraging them to think in naturalistic terms. If they’re fully engaged on that second level (as these clients were), then they’ll be more likely to make wise decisions about plantings—or, say, about revising the elevation of a waterfall—that make sense with respect to the overall design.
The satisfaction I find here comes from the fact that I was able to apply what I’ve learned about nature and the practicalities of construction … and from the certain knowledge that, as time passes and the landscape develops around the pond and waterfall, the impressions we wanted to make will only become more convincing and beautiful as time goes by.


