When it comes to pond concrete construction methods, there are several types to consider. One of the most common methods is using a rubber liner or other flexible sheet over dirt. This is by far the easiest, and when used in an area with very stable earth, it can work well over a long period of time.
The major drawback of the liner-on-dirt method is the integrity of the edge. Over time, the edge can get pushed down or moved by plants or animals, causing the edge to drop below the water line and creating a leak point. Many good contractors have developed methods to deal with this, but the softer the ground is, the more likely it is to occur.
Enter Concrete
Concrete or cement can be used as a pond perimeter or shell in several ways. For example, you can use cement to capture the liner in a hand-formed edge. This requires a mixture of cement with an admix to give it more stability along with a little color.
Dig down around the perimeter just a couple of inches and surround the trimmed edge of the liner with cement on both sides. Sand, small stones, rocks and boulders of all sizes can be imbedded in the edge on both the inside and outside. A shelf edge a few inches down from water level can be used as a support for the cement, stones and boulders resting on the inside. This method hides the edge above the water level, providing a more natural-looking edge treatment while securing the liner edge in a permanent way.
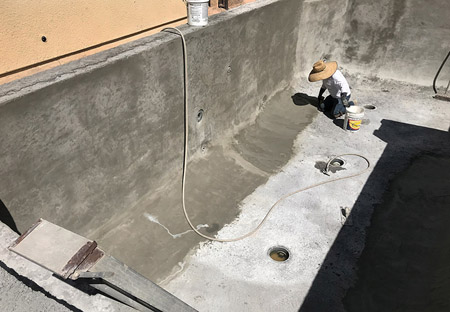
When most people think of a concrete pond, they tend to picture a completely monolithic shoot, like a pool in shotcrete or gunite, but that does not have to be the case. Concrete is the structural shape and strength, but it is not usually the sealing surface. Concrete is not a sealant, and it must be coated with something for a watertight seal. All concrete will crack over time, and those cracks can lead to leaks. The biofilm that forms on the walls of a living pond, along with the algae, can deteriorate the concrete as it matures, creating even more leaks.
This is why it is important to consider an additive to your concrete, such as Xypex, which creates crystalline structures that can fill in cracks as they form. However, sealing the surface with a plasticized material is always better, in my experience. My sealant of choice is spray-applied polyurea at about 80 mils thick. It has an elasticity of approximately 400% and will last a lifetime.
Design Ideas
Depending on the soil conditions, a solid monolithic structure is not the only way to build. While this design has a clear advantage in a very loose, sandy or unstable area, you have other choices in a more stable environment.
For example, the floor of the pond can be left as dirt, with only the walls built with concrete. This style can come in many forms depending on the depth of the pond and wall stability. The walls can be formed and poured as solid structures. This works well for ponds with straight sides, and there are companies that offer flexible forms that provide a variety of curved shapes.
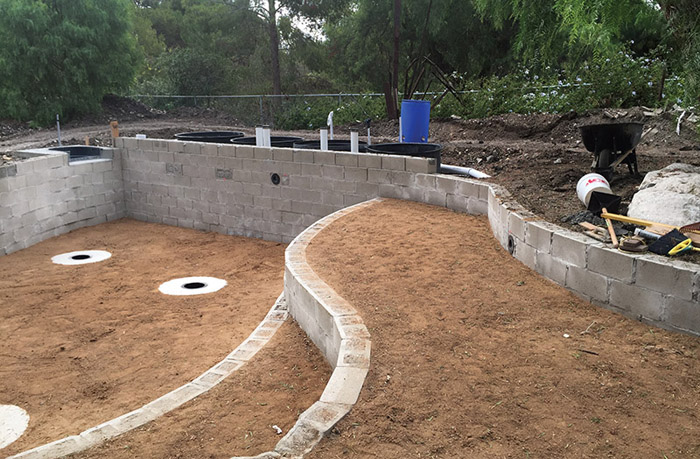
Solid poured concrete block on a narrow foundation ring is a good option and much easier to do yourself. Installing rebar in each horizontal row is a must. Don’t forget to add vertical rebar in one cell of each block for added strength.
Almost any shape can be accomplished with solid poured block construction, but the surface must be parged with a cementatious bond coat material to smooth out all the imperfections on the inside. If you skip this step, the interior of your pond will look like a castle wall. Water weighs a lot, so if you are using a rubber liner over the block, the water will press the liner into every line, hole or imperfection, causing an unsightly appearance. When using a spray-applied or roll-on coating, it will look just like the surface it is applied to, so the pondside surface of the block needs to be parged smoothly.
Block wall construction can incorporate plant and boulder shelves or multilevel bottoms while maintaining the structural integrity and shape. The block wall does not have to go from the floor to the top edge of the pond. It can start halfway up with the dirt floor tapering or bowling to meet the bottom of the foundation ring. With very stable ground, the pond might be 4 or 5 feet deep, with the top edge of concrete and block only a one or two blocks high. This forms a stable collar system for the top edge and cuts costs considerably.
Top Collar Systems
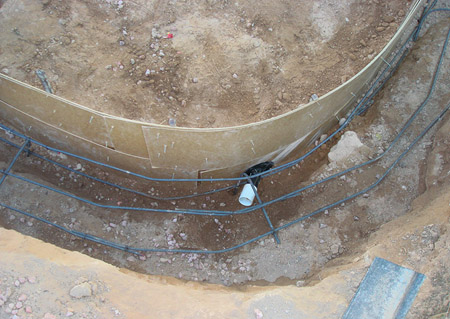
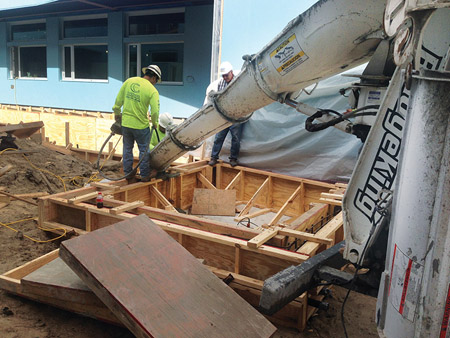
When building a top collar system, it is easier to dig the pond in two phases. First, dig out the pond to the top of the foundation ring. Next, dig out the foundation trench. The inside edge of the foundation is formed with bender board or Masonite, establishing a smooth interior finish and a top edge height for the foundation. The plumbing can be stubbed through the inside form, and bulkheads can be attached that will end up imbedded in the concrete when the form is removed. When the collar foundation is poured, the collar block is set as the first course in the foundation before the concrete sets. Once the concrete sets, additional courses can be stacked.
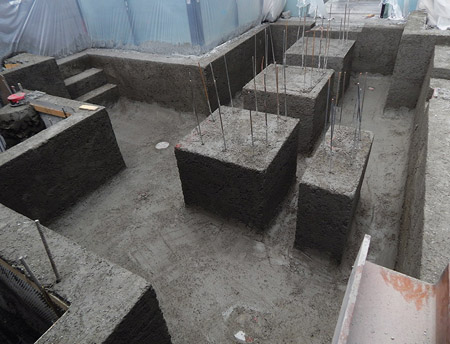
Rebar is installed in the foundation and in between each row of block, with vertical rebar in each block. Bond beam is always used in this method. Bond beam has a U-shaped cut in the top of the blocks to allow for the horizontal rebar to be laid in place. Once the first course is set and cured, the center of the pond can be dug out and the floor and wall shape created. If you were to dig the entire pond, it would be exceedingly difficult to form the foundation ring and hold it in place over the hole.
Digging in two stages allows the dirt in the center to be used as the bracing for the form as you pour. When the block gets poured solid, L-shaped rebar is installed upside down, with the short end just under the top edge of the block. The cement filler will not go all the way to the top, but just to the bottom of the bond beam cutout, leaving the horizontal portion of the rebar exposed.
This can serve two purposes. If the pond is to be sealed with polyurea or other flexible coating, the sealant can be applied up and over the inside edge of the block. This leaves the exposed rebar in a void space to bond mortar for the rocks or other top cap, such as flagstone, and lock them securely in place. If rubber liner is used, the liner is installed, and the pond is filled with water to within 1 inch of the top edge. While the pond is filling, wrinkles and folds can be dealt with until the pond is full. The liner gets pulled over the inside edge and trimmed close to the rebar as you attach the liner to the rebar with short pieces of mechanics wire every few inches. This method frees up your hands when installing the top cap or edging. If you’re going for a rock-edge look from a shelf below the surface, the water can be lowered to just below the shelf, with the wire holding the liner in place while you work.

When someone tells you that they want a concrete pond, it is important that they understand these different methods. Again, the most important thing is to secure the edge of the liner or coating and protect it from damage over time. Take the time to look at all the different options and use the method that best fits both the soil conditions and your budget.

