 A couple of years ago I got a phone call from a homeowner who was landscaping his yard and had a problem. He had built his house on the side of a steep hill, and to create a level area for the house, he had “cut and filled” into the hillside. (He carved into the hillside, making a steeper slope, and used the “cut-out material” to fill below the cut, creating a level area for the house.)
Well, in doing so, he scraped the hill down to bedrock and uncovered an underground stream. Thinking this was a great find, he built a massive 60-by-100-foot pond at the bottom of the stream and used sandbags to create a waterfall from the top of the property down to the pond, putting liner over the whole “stream.”
Well, it didn’t work very well. Not to mention how unsightly the liner looked — it was 15 feet wide at the bottom and about 65 feet long. This is when we came into the picture.
Gord, the homeowner, found us through our website and I quickly followed up with an on-site visit. It was late spring and water was still flowing down the liner. A walk through the woods led me to a large pond (about one-half acre in size) which fed Gord’s stream, and I knew we’d have to wait until late summer when the flow would be at its lowest.
Step One: A Dry Worksite
In early September, we started the project. Even though it was September, there was still a small trickle of water coming from the pond above, so the first thing we had to do was divert the water so we could work. As we were on bedrock, we chiseled out a groove in the rock using a jackhammer and attached a 10-foot-long piece of pond liner into the groove with smackies (concrete anchors), then cemented over the edge of the liner to prevent the water from flowing between the liner and the bedrock. At the other end of the pond liner, we gathered it all together and temporarily attached a pipe to the liner to catch the water, running the pipe around our worksite to divert the water.
Step Two: Disassemble and Rebuild
Once we had a dry worksite, we were able to disassemble the existing “stream,” then lay out the new design. At the top of the stream it was very steep and narrow, so we basically stacked rock to create a rock wall. One-third of the way down, we were able to flatten out the stream, creating a small pool which fed a massive, 5-foot-tall waterfall that was about 6 feet across. I knew that when the winter rains came, this stream would hum! Below the waterfall, we had a larger pool that flowed over loose stones for that “rippled water” look. Beside the big falls we built a sitting area. In low-water conditions, the sitting area is accessed by a path leading up the other side of the stream and crossing the ripple rock area, making you cross through the stream on stepping stones.

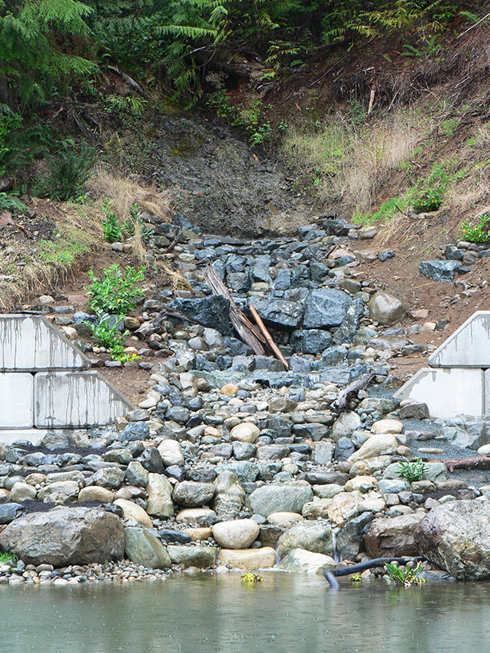
After we took off the liner (left), we climbed up the bank with our 303 excavator and started shaping the hill. We had to create platforms for the excavator to work on. (Right) The fall rains have finally come and we get to test out the waterfall!
Further down the hill the ground started to flatten out, so we widened the stream to 13 feet across. This gave us enough room for the fall-high water flows and channels for lower water flows to run through and still look good.
Step Three: Pumps and Finished Product
Since the summer flows were going to be so low, we installed two Tsurumi 9PL pumps on the edge of the lower pond. We just carved out a small bay for them to sit in and buried the pipes under rock and gravel. We used a 3-inch flex pipe from each pump to the bottom of the hill, then switched to 3-inch ridged pipe up the hill to reduce friction loss and to save a couple of dollars. We ran both pipes up to just above the big waterfall, as this was the “money shot,” and it gave us close to 10,000 gph at the falls. We also installed a third 2-inch line that ended about 10 feet below the main falls, where the stream started to widen out, in case the owner wanted to augment the flow with a third pump.
Overall, it was an exciting project and we learned a few new things. One of the challenges was that we had to build the stream from the top down because the only access was from the bottom. This created a challenge in backfilling behind the liner. We worked around it by using pieces of liner as opposed to a single sheet for the entire stream and strategically placing the overlaps in the areas of the stream with ripple falls, making sure we had an overlap that had at least a 1.5-foot vertical overlap.
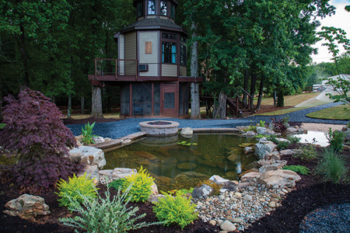
Once the project was completed and the landscaping was finished, it was a focal point of the back property. And when the rains came that fall, it was an awesome waterfall.
David Bossom is a Master Certified Aquascape Contractor and owner of Island Waterscape & Design Ltd, a design and build landscape construction company specializing in water features. Located on Vancouver Island, British Columbia, Canada, (a beautiful island in the Pacific Ocean), David has been in the Green Industry for 16 years and building water features for 11 of them. He can be reached via his website at Islandwaterscape.ca or by phone at (250) 897-1358.