In early April 2014, I was contacted by a very distraught young man. He’d recently had a small pond built for him by a local contractor. The pond was in a small, raised planter against the east wall on his side patio. He said the pond was a mess and all of his fish had died. I told him that I don’t do construction, but I agreed to come take a look.
>> See more Pond Best Practices on motors, filtration and design challenges
Phase One: Fix the Pond
“Wow” summed up my first impression, and not in a good way. The planter-pond was about 2 feet wide, 9 feet long and about 2 feet deep. The liner went up the block wall with rocks piled over it to hold it in place. As the rocks migrated downward, so did the liner, creating leaks and a mess. There was a 2,500-gph external pump with no leaf trap protecting it, pulling water from under the rocks on the left end near the house. There was a small canister filter next to the pump and a waterfall on the opposite end. At approximately 300 gallons, the young man said he liked it at first, but it fell apart rapidly. He said he couldn’t get any help from the original contractor. He wanted to redo it himself, but after researching, he was still unclear about what to do next. He did have a relationship with a concrete company that he’d used for other construction, which was a good start.

Phase Two: Make it Bigger
At the end of May — barely two months later — the same customer called me again. He said the pond was working beautifully, but with the water so clear and the fish apparently doing well, he wasn’t happy with it because it was too small. This started what is now known as phase two.
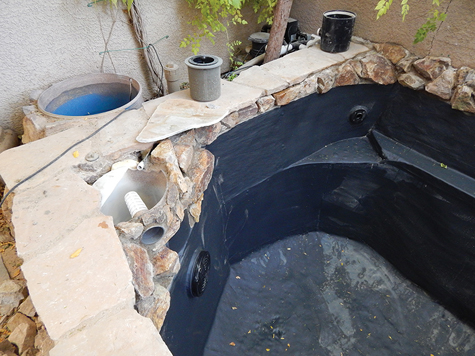
The concrete company was called back out to saw-cut and remove the patio floor and front wall about 6 feet out, and then pour a new front wall. This would make the pond about 1,100 gallons. A 3-inch bottom drain and a 55-gallon-drum static prefilter were added, but circulation was a problem with the lack of return plumbing. I created my first airlift current jets for this pond. They were installed in the new front corners to pull water from the bottom and push it around the pond surface with the addition of a small air line hidden under the top cap along the edge. This allowed for circulation and additional oxygen with no additional plumbing. I helped him seam a new section of liner onto the old, and he was off and running.
Phase Three: Make it Even Bigger
It was about this time when my customer met Shawn McHenry at Mystic Koi. The new pond addict had been learning a lot about koi and bought a couple of nice fish from McHenry. A koi addiction was starting to take hold as my customer learned more and acquired more fish.
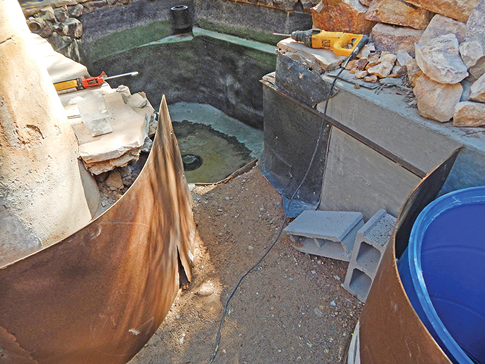
End of October, I received another call. “I love my pond, but it’s not big enough for the fish I want!” With limited surface space, the only direction to go was down. A 2-foot pond isn’t nearly deep enough anyway. He wanted to go 5 feet deep, but I told him that such an expansion could only be done with polyurea — not EPDM — as the liner material.
The fish were quarantined, and the concrete company came back out to excavate and touch up some areas. Paul Parszik of Artisan Aquatics was called in for the polyurea. The liner coming out from under the waterfall was blended and attached to the polyurea. With the dirt sides being fairly rough, Parszik applied the polyurea over geotextile cloth and Masonite with sand poured behind it to fill any air pockets. The only addition to filtration was the airlift circulator in the left corner. It was converted to an aerated biofilter at water level using a 30-gallon drum, some Bacti-twist and the existing airline with a larger air pump. The air pulled water in near the bottom of the tank, up through the aerated media and out the side, forming the same current pattern as before. At approximately 2,700 gallons, the customer loved his new pond.
Phase Four: You Guessed it…
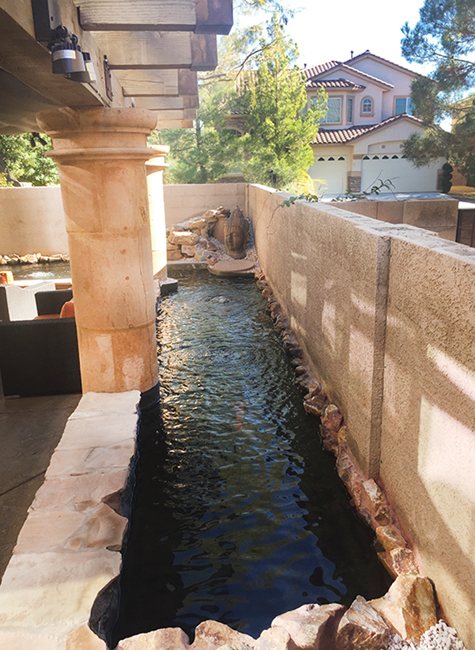
In May 2016, almost two years had gone by, and I got another call. “I love my pond, but it’s too small!” He wanted to dig out the 3-foot-wide, raised planter on the south wall and connect it to the existing pond. His concrete guys came back out, excavated the planter and poured a retaining wall on the inside of the block wall. There was just enough room at the left end near the waterfall to connect to the existing pond. The new section would be about 35 feet long, 2.5 feet deep and 3.5 feet wide, plus filtration, making his total pond just under 6,000 gallons. Once again, Parszik returned to apply the polyurea. The polyurea formula he uses is the only one that can be applied to existing polyurea and attach with confidence.
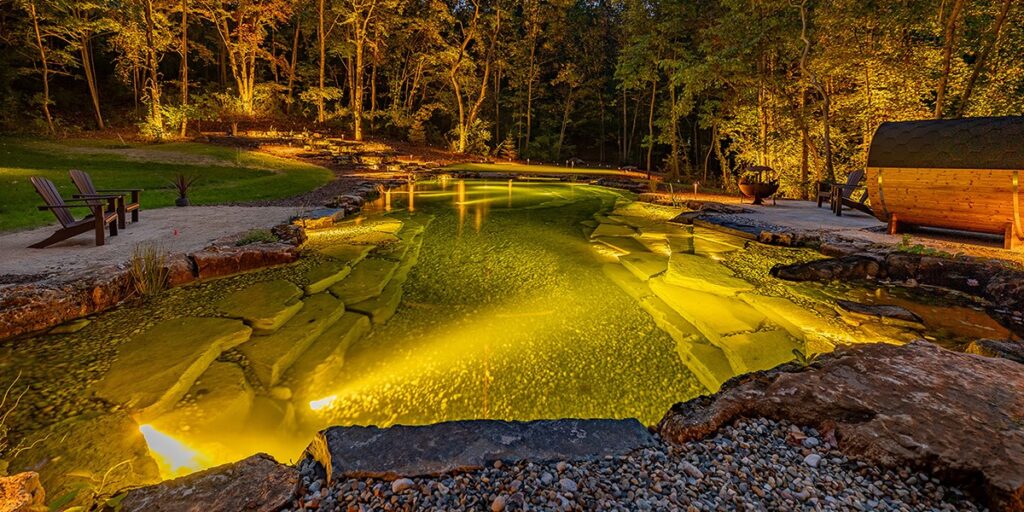
Plumbing and equipment were an issue. There wasn’t much room to work with, so we ran it all on an airlift. A Waterway Renegade skimmer modified for a 3-inch bottom outlet was installed on the far right end, along with a 55-gallon-drum settlement tank and prefilter. A 3-inch bottom drain was installed about 4 feet from the end under the skimmer. A downflow airlift-operated biofilter was installed at water level on the left end below the waterfall in the corner, which gave just enough room for the connection to the main pond. The 3-inch outlets from the skimmer and prefilter combined into one 4-inch line that sent water all the way down to the airlift inside the biofilter. The airlift exits the water inside the top of the tank, where it flows downward through the media and separation plate and exits at the bottom through two 3-inch returns. This layout created a stream-flow circulation pattern for this part of the pond. With the new section being so long, two more 5-inch air diffusers were added in flush-mounted penetrations, dividing the floor into thirds. An 80-lpm Medo air pump operates the airlift, and another 45-lpm Medo air pump on a timer operates the in-floor aerators.
He is now completely out of space! He did attend his first koi show, though. In early March, he took four of his fish to the San Diego Koi Show and did well. Three of his fish brought home awards for “Best Novice Mature,” “Best in Size 8B” and “Novice Champion,” respectively.
Only one question remains: is he a pond addict or a koi addict? Only time will tell.