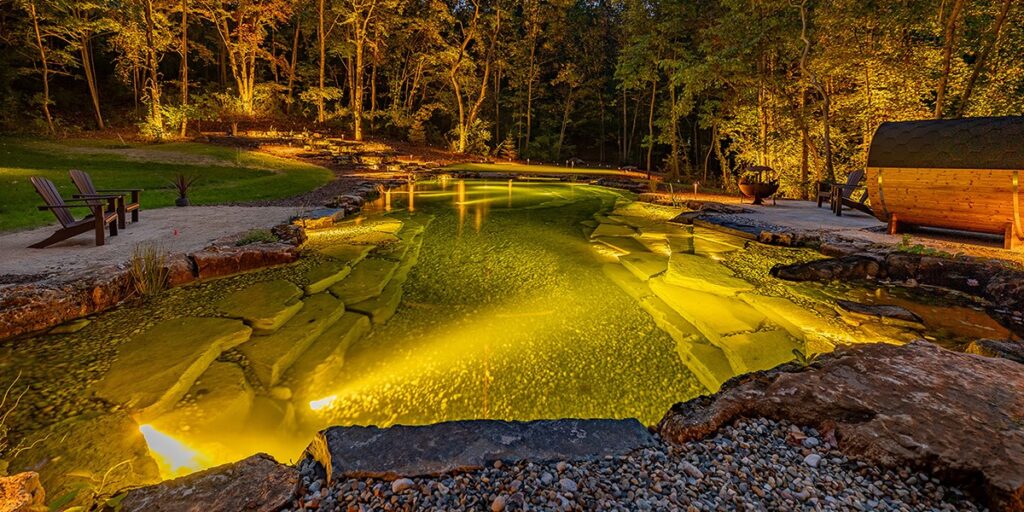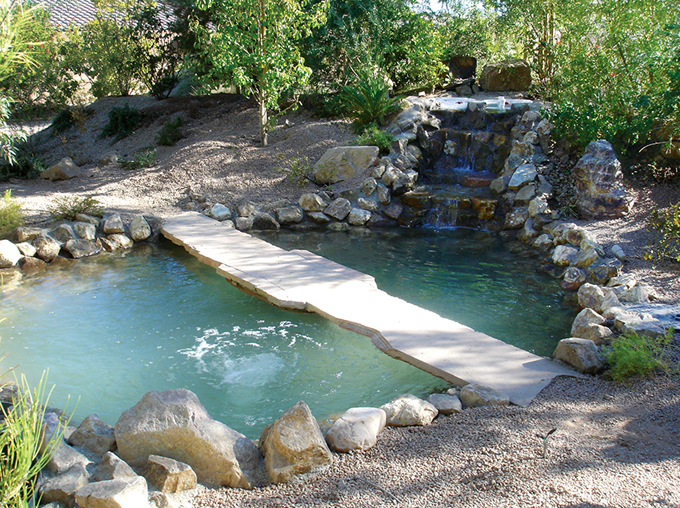
The floating bridge, or steppingstone look, has been popular for some time now in both formal and garden pond designs. Building them in a manner that will stay stable over time isn’t actually that difficult. Floating stone bridges give an appearance of freedom that solid bridges or bridges with railings simply cannot. The feeling of being part of the pond is very appealing, considering the relationship most people build with their fish over time.
Concrete ponds with a polyurea seal or other flexible seal coating are fairly easy. The swimming pool industry has been doing this for a long time now. When it comes to the support structure for the steps, the only difference between a living water feature and a pool is the shape. In a living feature with fish, more open space between the step supports is desired for better flow and more volume. Instead of standard square support blocks, a living water feature is better served with less restrictive round pillars, allowing more room for the fish and better circulation. If a designer has specified the square supports, try to build them as narrow as possible and round the corners a little, if you can.

Liner Ponds
Building floating steps in a liner pond is a little more difficult. First off, you can’t put liner around the pillars or seal to them in any way that would breach the liner. Secondly, it’s going to be very difficult to replace the liner later on if the need arises. The pillars must be poured on top of the liner with the liner left unscathed below them. They cannot be individually set — all pillars must be combined or joined as one monolithic assembly. This creates a lot of weight on top of the liner, but steps can be taken to minimize the pressure per square inch and protect the liner.
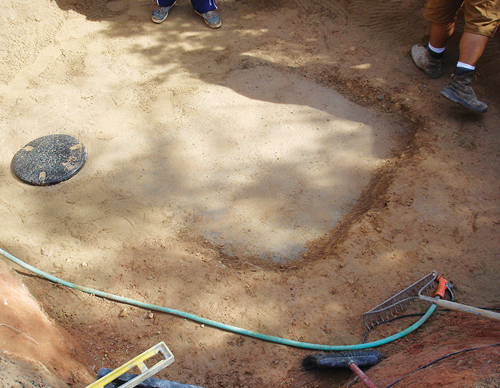
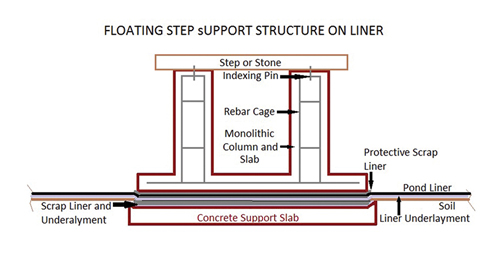
Start by establishing the area to be crossed and excavate it approximately 6 inches deeper than the pond floor. Then, pour concrete back to the level of the pond floor. This lower support slab should have a simple rebar cage in it, just like you would install in any slab that is going to support some weight. Usually no form is required, because the surrounding soil is the form. The support slab should be troweled as smoothly as possible and feathered into the surrounding soil.
Once cured, cover the support slab with a layer of padding or underlayment separate from the underlayment normally used for the liner. The normal underlayment is then laid out just as in any standard liner installation. A scrap section of liner is then laid over the support area, and the main pond liner is installed over it. Install the rest of the main liner as you normally would from here, with the exception of the steppingstone support structure. Lay another piece of scrap liner over the area the pillar slab is to be poured on, with the forms for the slab set on top of this piece. The excess can be carefully trimmed back to the form or slab after the form is removed. This layering on both sides of the main liner adds a lot of protection, helping the main liner last longer.
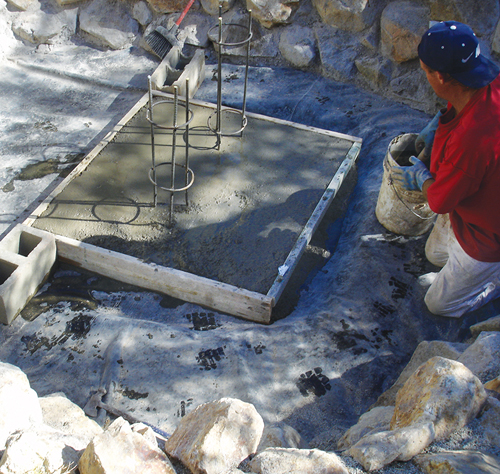
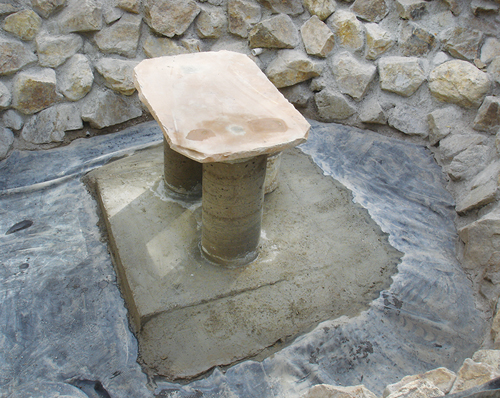
Once the form is in place, set the rebar structure and pour the slab. The 10- to 12-inch Sonotube forms are set around the rebar pillars on the lower slab and filled with concrete while the slab is wet, making the pillars and slab one monolithic structure. Level the pillars at the correct height and place a short rebar pin in the top. When using flagstone, I double the pieces, drilling the locating holes in the bottom piece. The top decorative piece is bonded to the lower piece with Versabond, hiding the holes.
>> View these feature article images via Gallery Spotlight, click here!
The lower slab under the liner can be buried deeper with the upper slab at the pond’s surface level if you desire, but many times the slope of the floor can be dealt with at the slab and feathered in as shown in the photos.
This is just one example of how to do this. In the past, I have created an 18-foot-long, stepped walkway in a 5-foot-deep pond with several thick stones approximately 3 by 4 feet, just inches apart. When doing multiple stones, a pattern of each stone can be made using Masonite or cardboard, with the locating holes marked in them. The patterns can be laid out on the pond floor and arranged prior to pouring the pillars, and then placed on top of the pillars over the indexing pins to ensure a proper fit when finished. When using single, larger or thicker stones, the locating holes must be drilled carefully to prevent breaking through the top side.
Eric Triplett at The Pond Digger has become an expert at the floating stone look and can also help with examples of how this can be done in different applications. Let your clients “walk on water” in some of your own designs with the floating stone look.