We have all seen both the “WOW!” waterfall as well as the “What were they thinking?” waterfall, right? Most prospective customers have been exposed to the latter, which makes selling them on your better-built and more aesthetically pleasing waterfall much easier.
Since the aesthetic aspects of a waterfall are subjective, I will try to focus this
article on the structure and mechanics of how to properly build a natural-looking waterfall. I will not get into the design basics of location, viewing angle or geometrically shaped architectural waterfalls. That being said, follow these steps and the outcome will deliver both a properly built and an aesthetically pleasing waterfall, regardless of where and what size it is!
When building a waterfall it is critical to the end result that you are continuously asking yourself, “What will the water do now?” after every stone is placed. In essence we build the waterfall backwards. So when we place a boulder above another boulder, we are focused on making sure that once the water cascades off the upper boulder, it creates the desired result when the water drops onto the lower boulder. Do this over and over and over and you have yourself a consciously built waterfall, not one built by chance.
Though the concept is easy, there are many factors to be considered in order to accomplish this, such as:
- Waterfall dimensions (height, width, depth)
- Number of initial weirs/waterfall filters
- Number of overall spillways
- Boulder size
- Pump size
- Build a slope or retaining wall?
- Waterfall landscape areas
- Lighting placement
NOTE: All of the above considerations have to be decided prior to starting to build the waterfall, as they are all interrelated. As you build you can modify your initial concept, but a prior overall plan is needed for space layout, aesthetic and budget planning.
Dimensions

Waterfall dimensions are the most important factor to be considered, yet they are also the most-ignored by contractors who build what a customer tells them they “think” they want and not what they really want. A lot of customers need some education as to why a 6-foot waterfall cannot go into a 6-foot by 8-foot pond. It is your job to explain visual aspects, dimensions, scale, et cetera. The height must be to scale with the slopes on both sides of the waterfall. If the height of the waterfall is too high and is not to scale with the side slopes, you will end up with an unnatural-looking, pyramid-like waterfall. The waterfall also has to be scaled to the pond being built (or to the area if a pondless waterfall is being built).
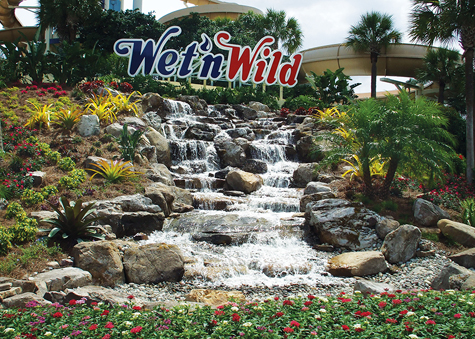
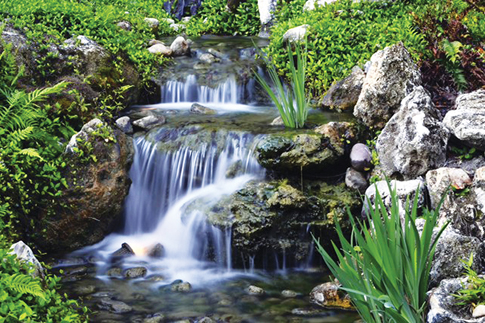
The depth (front to back) measurement is extremely important, as it is what determines both the quantity and style of cascades. The greater the distance between the waterfall’s origin at the top and the ground elevation at the pond or pondless basin, the higher the quantity of cascades, directional water flow changes and mini catch-pools can be incorporated.

NOTE: This applies to every waterfall regardless of the waterfall’s height.
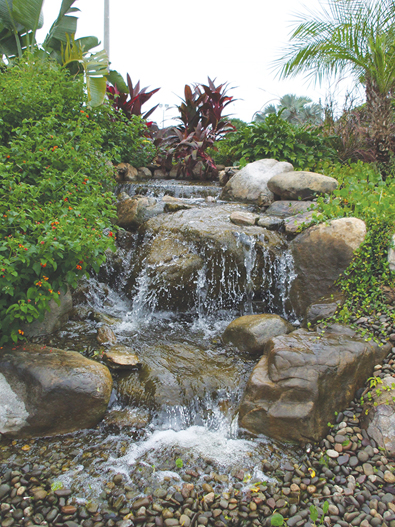
Boulder Size
The size of the boulders used will either make the waterfall look like a pile of small pebbles dumped on the ground or give the appearance of a natural waterfall. The larger the boulders used, the more natural the waterfall will look. For example, a 2-foot waterfall should mostly incorporate two-man-sized boulders, while a 4-foot waterfall should mostly incorporate three-man-sized boulders, and any waterfall that is higher should include a large number of boulders that require the use of heavy equipment (mini excavator, skid steer, et cetera) to set into place.
Yes, a waterfall can have too much water flowing over the rocks. Too large of a pump can be overbearing, creating excessive splash that causes water loss and taking away from small, interesting cascade nuances. Select the proper size pump(s) based on the size of the boulders used and the waterfall’s widest spillway. The larger the boulders used for the waterfall, the higher the volume of water that will be needed in order to create a realistic effect. Next, you will need to measure the waterfall’s widest spillway (in inches) and multiply by 50 gallons per hour to 200 GPH, depending on the size of the waterfall and the boulders used, to arrive at the number of gallons needed for the proper waterfall flow.
NOTE: The pump will need to have a higher GPH rating so that the proper GPH at the spillway can be achieved after all head loss calculations have been made. Commercial-sized waterfalls can require multiple pumps to achieve the proper water flow.
Slope or Retaining Wall?
The back of the waterfall will require a sloped berm of dirt or a retaining wall. Retaining walls should only be used when space is limited or if the retaining wall is to be part of an overall landscape design and used as a hardscape highlight point. Creating a sloped berm of dirt allows you to dispose of the excavated dirt and creates a landscape area behind the waterfall. If you are not using a retaining wall you should landscape the slope before rains and have a minimum slope angle of 3:1 to prevent erosion of the berm. If you are installing a retaining wall, make sure to always install a footer to prevent the wall from sagging or collapsing in the future once the dirt starts to settle and plant roots shift the dirt around. Obviously, if you’re building onto a corner of a home or an existing slope then this is not a concern.
Waterfall Landscape Areas
To achieve a natural-looking waterfall you must take into consideration what will be used for landscaping and where it will
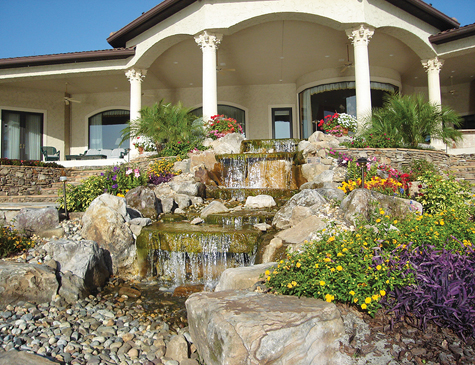
be placed. I prefer to install plants that will grow over the edges of the waterfall and cover some of the rocks, just like it happens in nature. Create planting areas surrounding the waterfall face for terrestrial plants as well as within the waterfall for aquatic plants. Placing plants both outside and inside the waterfall is especially important if you have built a waterfall with large elevation changes between spillways that require a large retaining wall between elevation changes. These plants will aid in naturalizing (hiding) the wall. Once plants grow in the transformation is incredible!
NOTE: A touch of green or some other color also changes the dynamics of a geometric-designed waterfall.
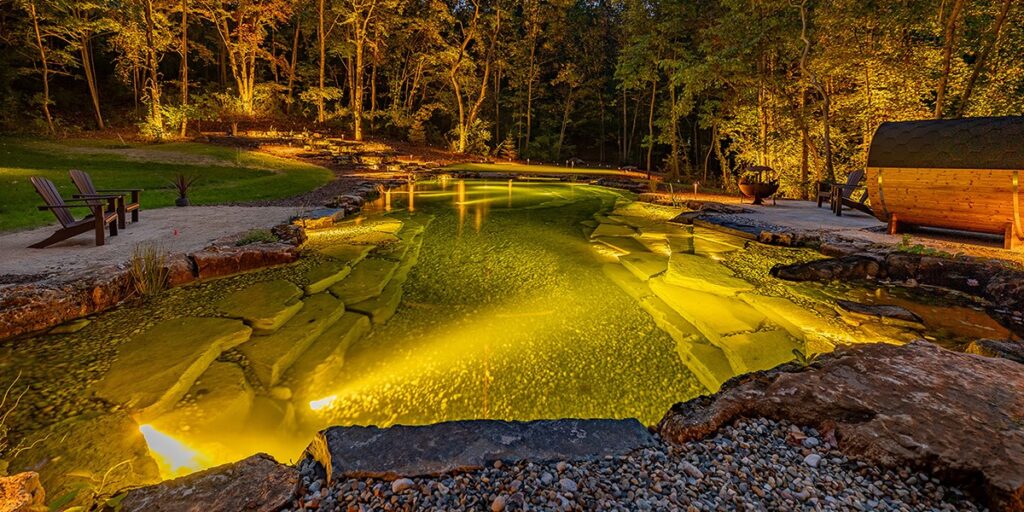
Lighting Placement
Lighting…my favorite! Ponds look nice during the day, but a well-lit waterfall in which the lighting effects create a spectacle of reflected lights dancing like fire flames on the rocks and surrounding landscapes is just awesome! When building the waterfall you must take into consideration how many lights to use and where they will be placed. Whether you light up every cascade or just a few is up to you, but always make sure that the light fixture is completely submerged and has at least 3 inches of water above it.
When you look into a swimming pool during the day, you see the shadows of the ripples at the pool’s surface being reflected as they move across the bottom of the swimming pool. When you install a light fixture underwater you reverse the effect to reflect the shadows of the ripples onto the waterfall face and surrounding landscaping, walls, roofs, et cetera. We like to also play with different bulb wattages within the same waterfall to create the illusion of depth. When selling ponds to prospective customers, make sure to mention these evening effects; customers are probably at work during the day like most of us and are more likely to enjoy their ponds in the evenings.
If you place the light fixtures above the water you will get a static effect with minimal reflective light movement. Static lighting should be reserved for the surrounding paths and landscaping areas. When possible, use LED units, as this technology has come a long way since the days when they were cheap, dim units with a purpleish glow. Make sure all of your connections are tight and covered with dielectric grease to prevent corrosion and lack of power to the light fixtures.
In all, there are many ways to build an aesthetically pleasing and structurally sound waterfall. The above descriptions work for us, both here in Florida and as far away as two projects in Slovakia. Whether we’re building a 2-foot tall waterfall or we’re building a waterfall using 20-ton boulders, all of these dynamics apply. At the end of the day, make your customer happy and only build a waterfall that you would build for your home. Once you’re done, sit back, relax…and enjoy!

Great article Freddy! I especially appreciated the guidelines for quantity and size of boulders relative to waterfall size – good stuff! Hope to see you at some point this year. Have a great season brother! D
Thank you Demi, I hope to see you in the near future……….